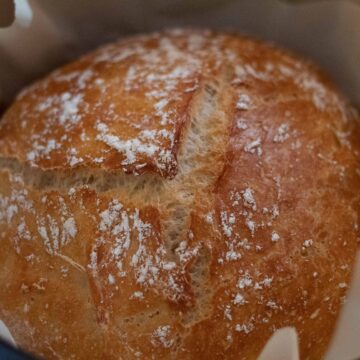
Crusty Dutch Oven Bread
Homemade bread is truly a wonderful thing. This crusty white bread is baked in a Dutch oven resulting in a thin crispy crust and moist interior. In addition, the dough can be kept in the fridge for up to a week so you can double or even triple this recipe and always have dough on hand.
Would you like to save this recipe?
There is nothing quite like homemade bread. The flavor. The texture. It just beats store-bought bread in every way. And you can use it for any meal of the day. For breakfast, you could toast it and spread on some butter and jam. At lunch, you can use it to make a sandwich or to have with soup. And, of course, it makes a great side at dinner.
Without a doubt, this bread is one of my family’s absolute favorites! I’ve been making this crusty Dutch oven bread recipe for years and it is considered a staple in our home. As a result, we have enjoyed countless loaves of it. And yet, each time we have it we experience the same level of enjoyment that we felt with that first bite. It’s just that good!
Tips for Making Crusty Dutch Oven Bread
- The Dutch oven really is key here. You can make this bread without one by baking it on a cookie sheet, but you won’t get quite the same results. The crust will be slightly thicker and tougher, though still delicious!
- I provide both weight and volume measurements in the recipe. However, I highly recommend using a kitchen scale to weigh the ingredients. This will ensure you have the right balance of ingredients.
- For this recipe, if you know your yeast is alive, you don’t need to worry about proofing the yeast first. Simply add all of the ingredients into the bowl and mix them together. However, if you want to be sure before adding it to the rest of the ingredients you can mix the yeast and warm water together and allow it to sit for about 5 minutes. You’ll know your yeast is alive and good to go if it becomes foamy.
- Once you’ve baked this dough, I recommend eating it up that day. If you still have some bread leftover, you can eat it the next day but it will be a bit drier. Of course, you could toast it which would help to mask some of the dryness.
Items I Used to Make This Recipe
This post contains affiliate links. This means that I make a small commission, at no extra cost to you, when you purchase through those links. You can read my full disclosure Privacy Policy.
KitchenAid Stand Mixer
Dutch Oven
Kitchen Scale
How to Make Dutch Oven Bread
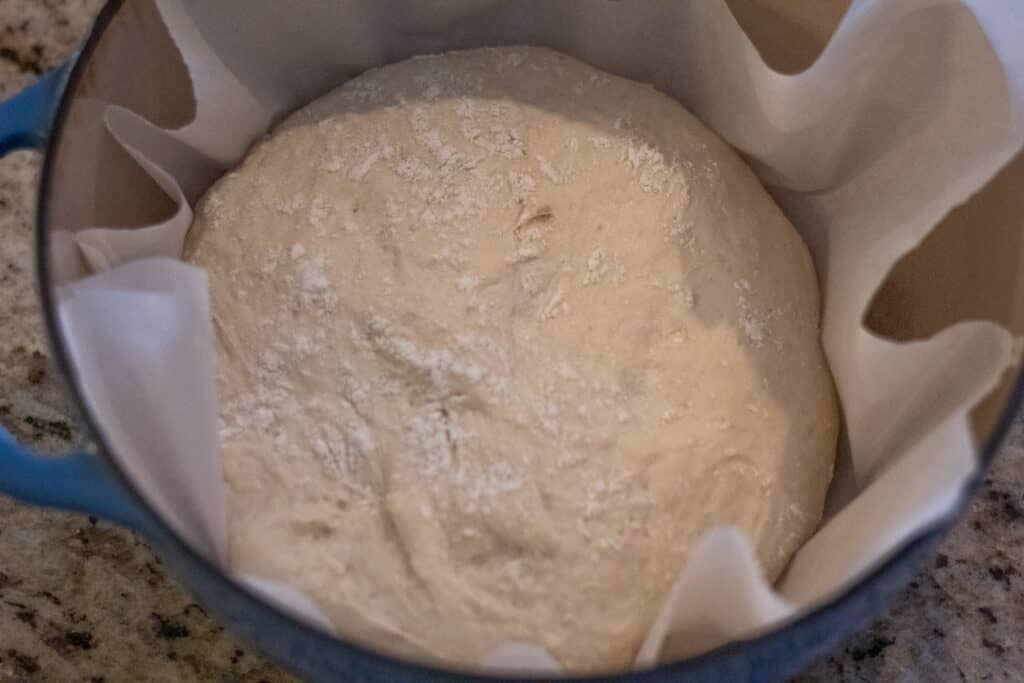
Combine all the ingredients together either in the bowl of a stand mixer or a large bowl. Work the dough until it is smooth and doesn’t tear when mixed. This will be about 1 minute in the stand mixer or about 5 minutes hand stirred. Cover the bowl and allow it to rise for 2 hours on the counter.
After two hours, place the bowl in the fridge and allow the dough to chill for at least 4 hours but ideally overnight.
Pull the dough from the fridge and place it on parchment paper. Lightly dust the top to keep it from drying out, then cover it with a towel. Allow the dough to come up to room temperature, which usually takes about an hour.
30 minutes before you’re ready to bake the dough, place the Dutch oven in the oven and preheat to 450 degrees.
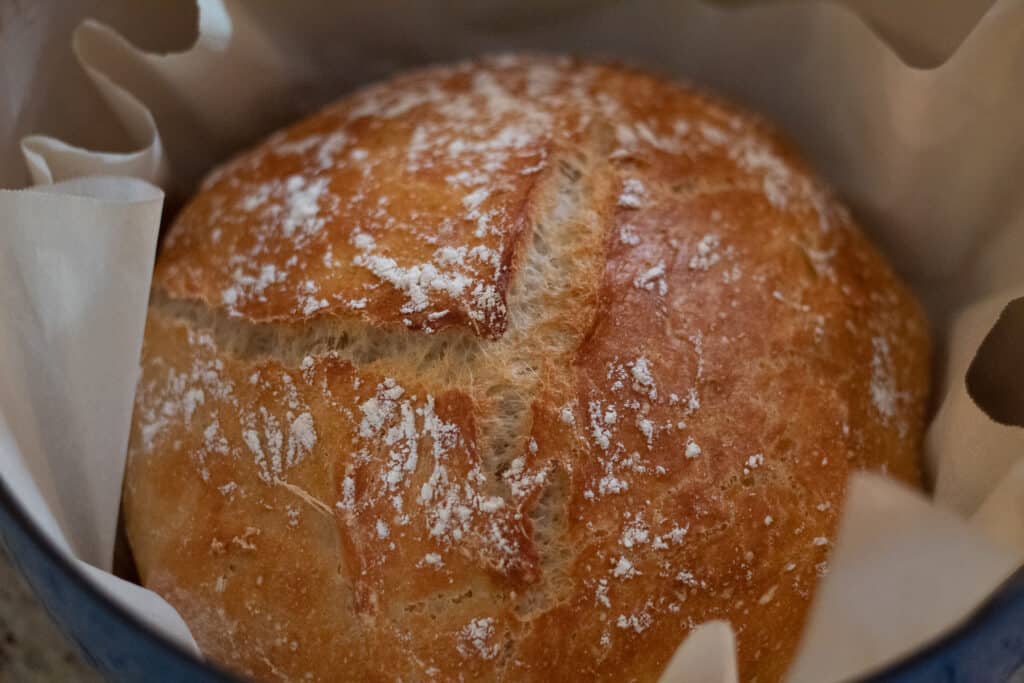
Place the parchment paper and dough into the Dutch oven and cover.
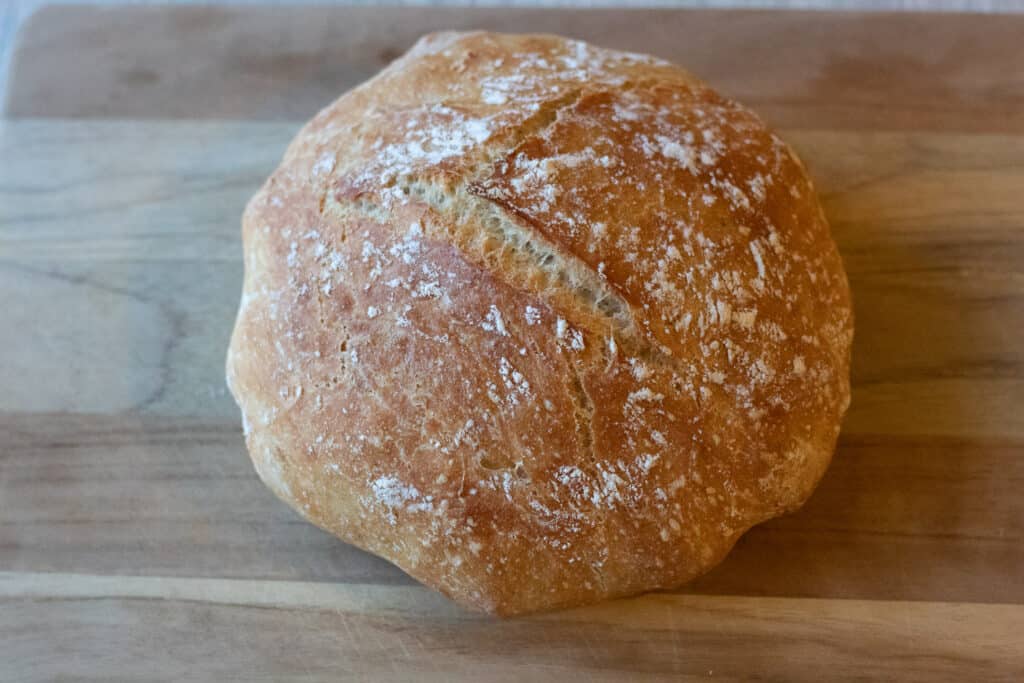
Bake for 30 minutes covered. Then, take the lid off and bake another 15 minutes or until golden brown.
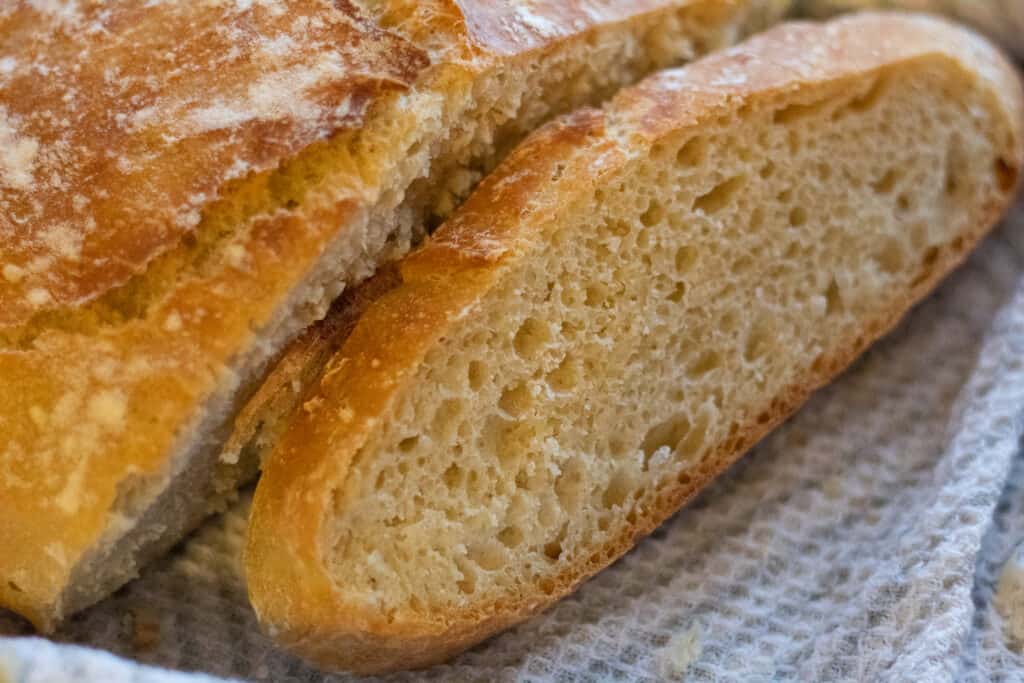
Allow the bread to rest for at least 15 minutes before slicing it.
What if I want to make the dough the same day I want to eat it?
This is definitely an option, but you’ll need to get it started early enough in the day. Here is a sample breakdown of timing everything out:
- 8 am – Make the dough and let it rise in the bowl on the counter for two hours.
- 10 am – Move the dough to the fridge to chill for 4 hours.
- 2 pm – Pull the dough from the fridge and dump it out onto parchment paper. Dust lightly with flour and cover with a towel. Allow it to rest in a warm spot on the counter for about 1 hour.
- 2:30 pm – Place Dutch oven in the oven and heat to 450 degrees.
- 3:00 pm – Put dough and parchment paper into the Dutch oven, cover with the lid, and bake for 30 minutes.
- 3:30 pm – Remove the lid and bake another 15 minutes.
- 3:45 pm – Pull the bread from the oven. Allow it to rest on the counter for at least 15 minutes.
- 4:00 pm – Ready to enjoy!
How to Store Leftover Dutch Oven Bread
This bread really is meant to be eaten the day it is baked. Because there are no preservatives, it tends to dry out fairly quickly.
However, if you have some leftover and want to keep it for the next day, the best way to preserve it is to wrap it in two layers of plastic wrap.
Related Recipes
Quick and Easy Chicken Noodle Soup
Crusty Dutch Oven Bread
Ingredients
- 3 1/4 cups all-purpose flour plus more
- 1 1/2 teaspoons salt
- 2 1/4 teaspoons active dry yeast
- 1 1/2 cups warm (110 degrees F) water
Instructions
Stand Mixer Directions
- Prepare a medium-sized bowl with a thin coating of oil. I use extra virgin olive oil, but you can also use canola, grapeseed, or any other oil you prefer.
- Combine all ingredients in the bowl of a stand mixer. Using the dough hook, mix at low speed for a few seconds until ingredients are mostly combined. Then, increase the speed to medium and allow to mix for about 1 minute or until the dough appears smooth. The dough will be sticky.
- Move the dough into the prepared bowl. Cover and place it somewhere it won’t be disturbed. Allow it to rise for 2 hours.
- Move the bowl to the fridge to chill for at least 4 hours, but overnight is ideal.
- Remove from the fridge and place the dough onto parchment paper. Dust the top lightly with flour to prevent drying, then lay a towel over the dough. Allow the dough to rest for about 1 hour or until it comes up to room temperature. The dough will settle and spread out a bit.
- 30 minutes before you’re ready to bake the dough, place a dutch oven with its lid on into the oven and preheat to 450 degrees.
- When ready to bake, place the parchment paper and dough into the dutch oven and replace the lid. Bake covered for 30 minutes; remove the lid and bake for another 15 minutes or until golden brown.
- Allow the dough to rest for at least 15 minutes, but ideally an hour, before slicing.
By Hand Directions
- Prepare a medium-sized bowl with a thin coating of oil. I use extra virgin olive oil, but you can also use canola, grapeseed, or any other oil you prefer.
- Place all ingredients into a large bowl and mix until well combined and the dough appears smooth. This may take several minutes.
- Move dough to prepared bowl and cover. Place the bowl somewhere the dough won’t be disturbed and allow to rise for 2 hours.
- Move the bowl to the fridge to chill for at least 4 hours, but overnight is ideal.
- Remove from the fridge and place the dough onto parchment paper. Dust the top lightly with flour to prevent drying, then lay a towel over the dough. Allow the dough to rest for about 1 hour or until it comes up to room temperature. The dough will settle and spread out a bit.
- 30 minutes before you’re ready to bake the dough, place a dutch oven with its lid on into the oven and preheat to 450 degrees.
- When ready to bake, place the parchment paper and dough into the dutch oven and replace the lid. Bake covered for 30 minutes; remove the lid and bake for another 15 minutes or until golden brown.
- Allow the dough to rest for at least 15 minutes, but ideally and hour, before slicing.
you don’t bloom the yeast in water with some sugar before mixing it into your dry ingredients?!
Hi, Steph. I just put everything in at the same time. If you’re concerned that your yeast is no longer active you can bloom it in the warm water first, no sugar needed. Hope this helps!