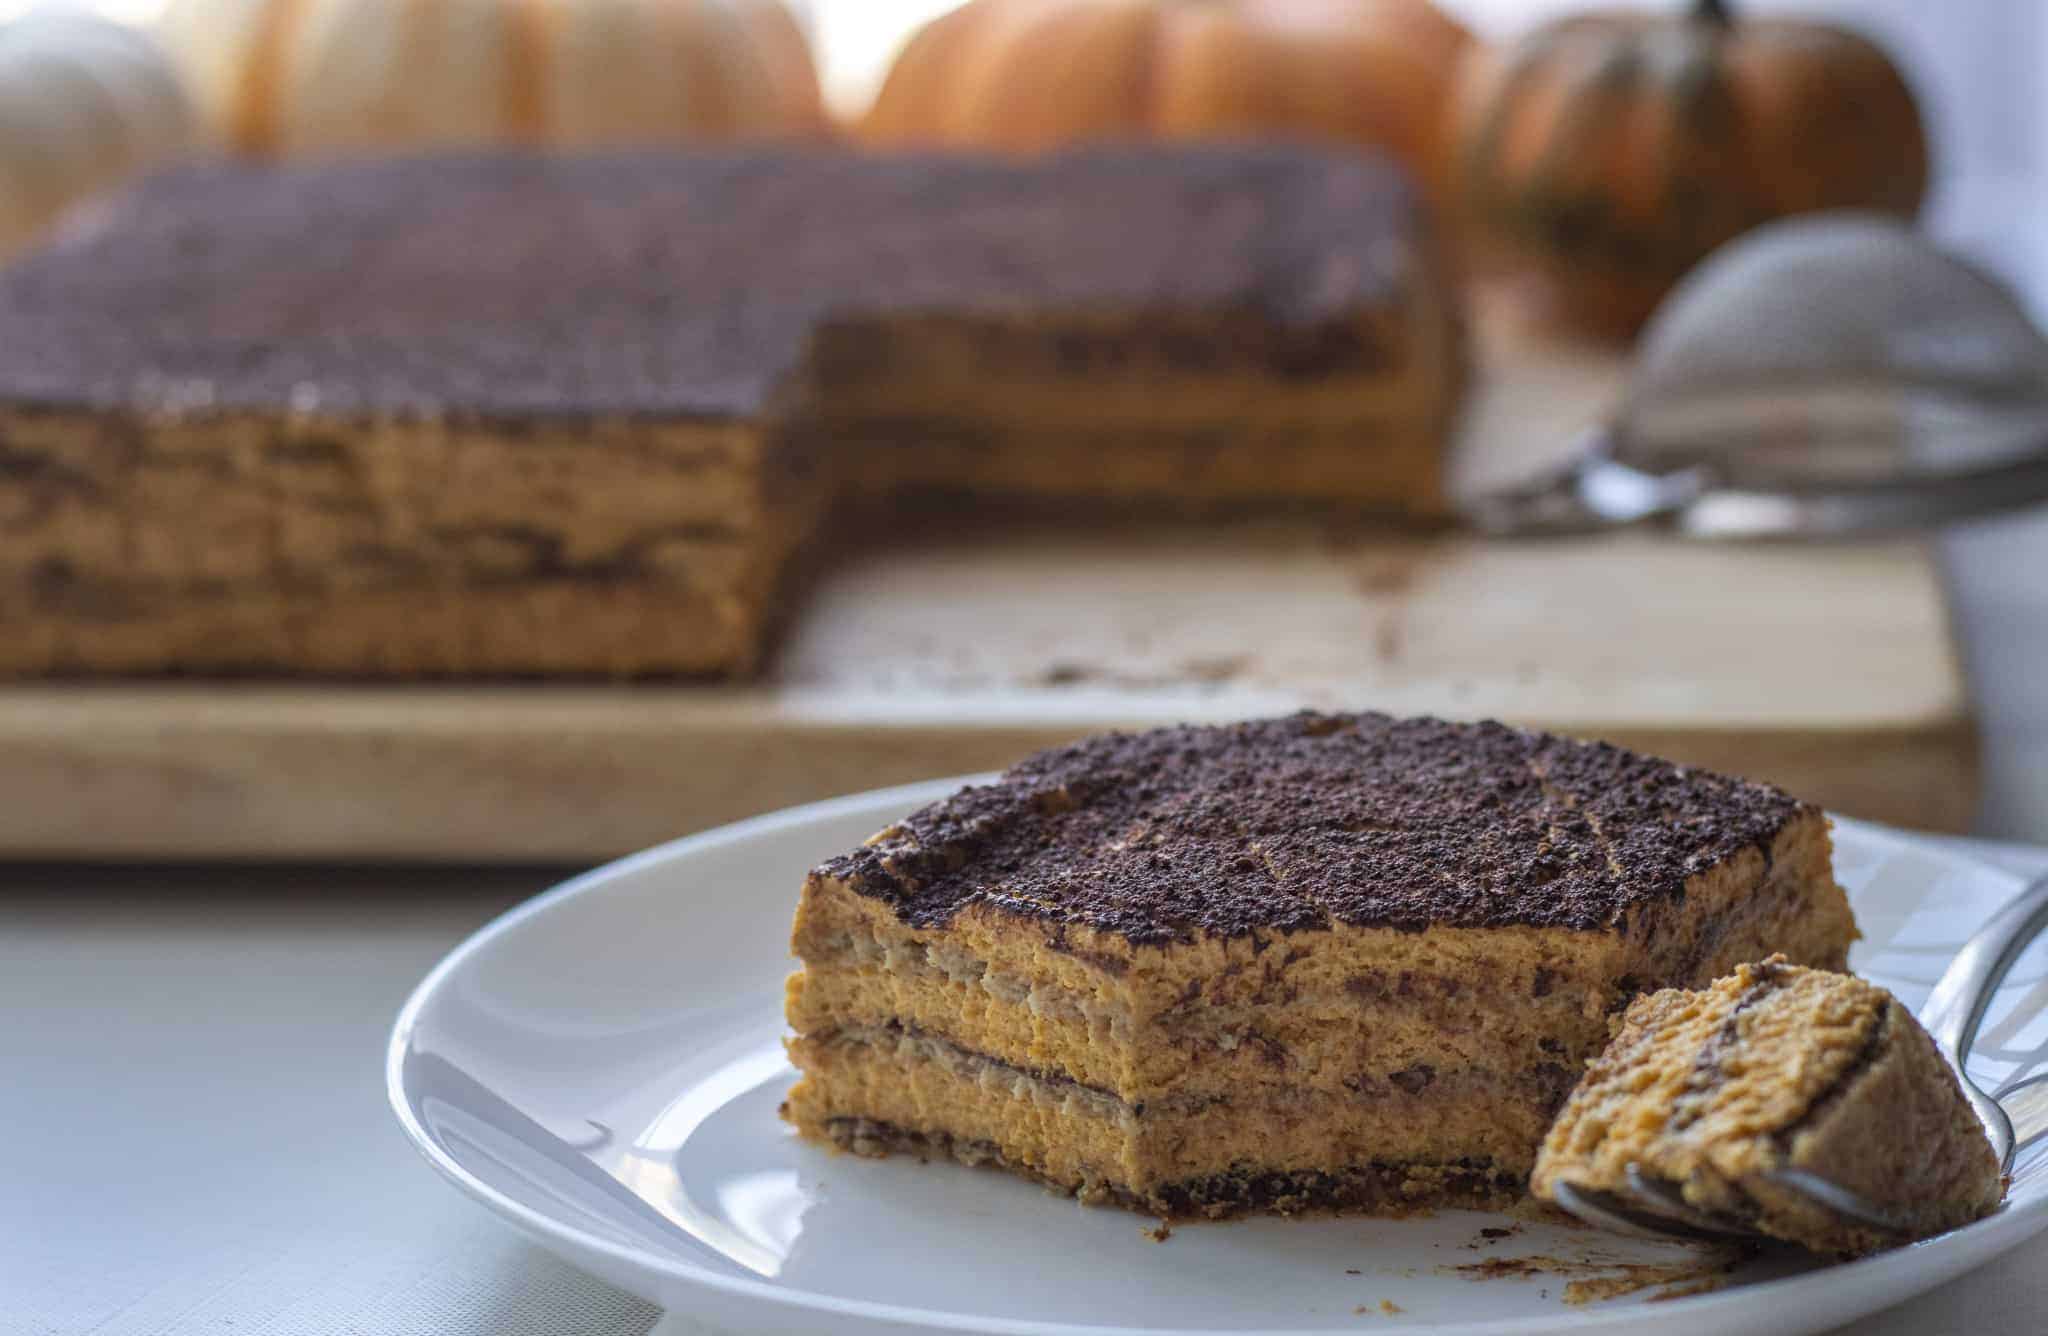
Pumpkin Icebox Cake
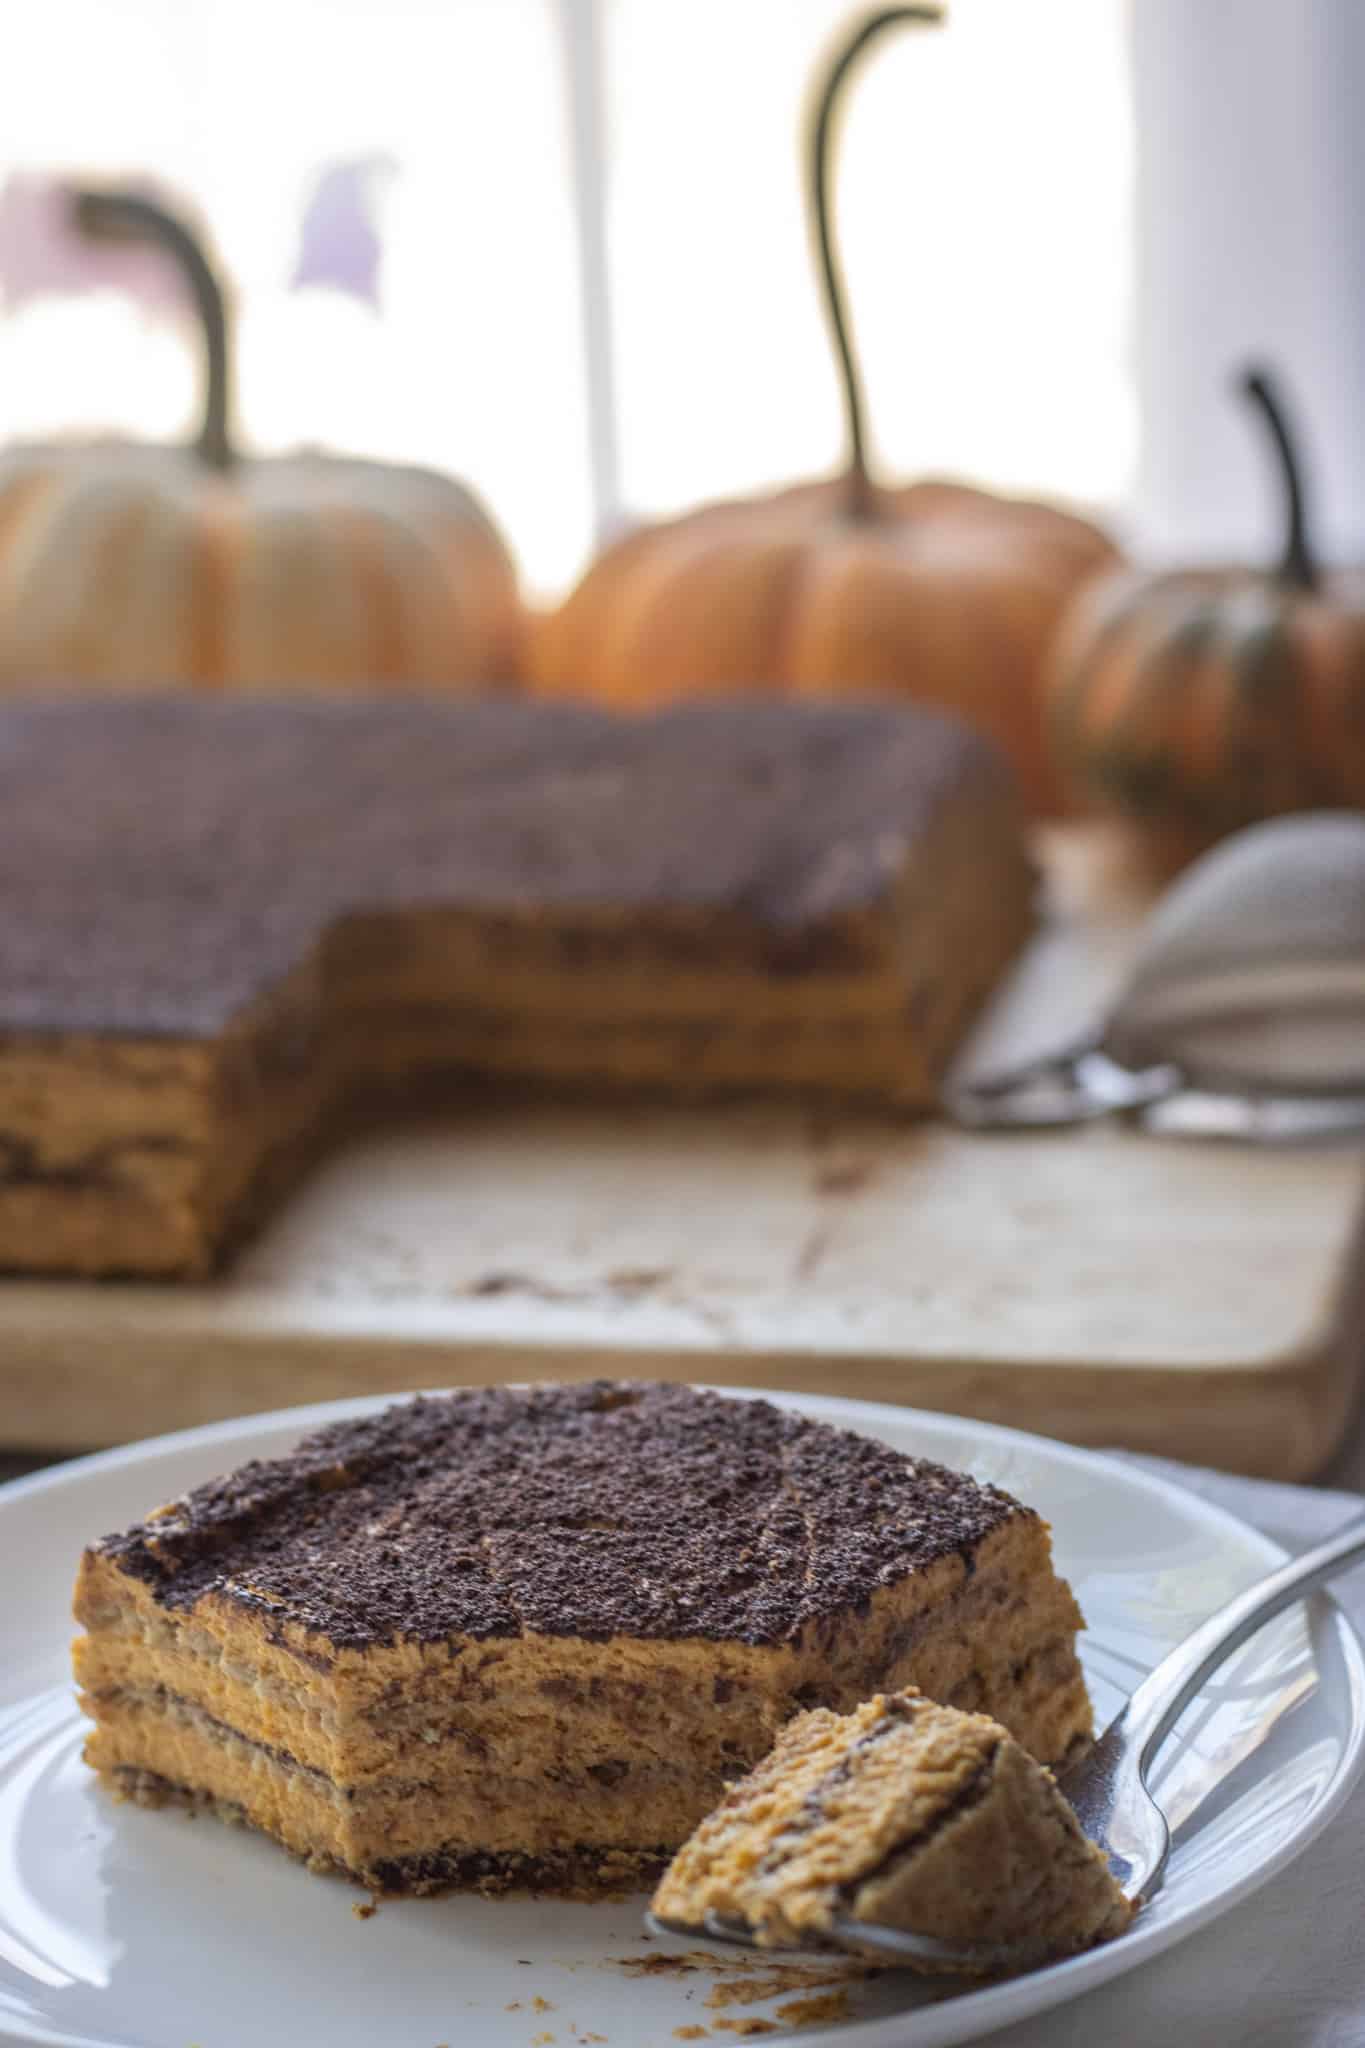
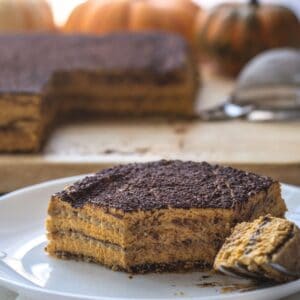
This Pumpkin Icebox Cake has the perfect balance of pumpkin and chocolate flavors that will satisfy both pumpkin lovers as well as the pumpkin reluctant. It’s creamy and cakey (despite having no actual cake!) with a delicate cinnamon and spice flavor. Bring this unique dessert to your next fall gathering1
Would you like to save this recipe?
What Is Icebox Cake?
Icebox cake is made up of flavored whipped cream between layers of cookies or wafers. It gets its name from the fact that it must be kept refrigerated (or, in the icebox in old-timey terms).
In this pumpkin icebox cake, the graham crackers act as the “cake” layers and pumpkin and spice-flavored whipped cream as the filling. There are also layers of cocoa powder that provide a chocolate element to the whole dessert!
Step By Step Instructions
Note: Full list of ingredients, their amounts, and instructions can be found in the recipe card below.
Step 1:
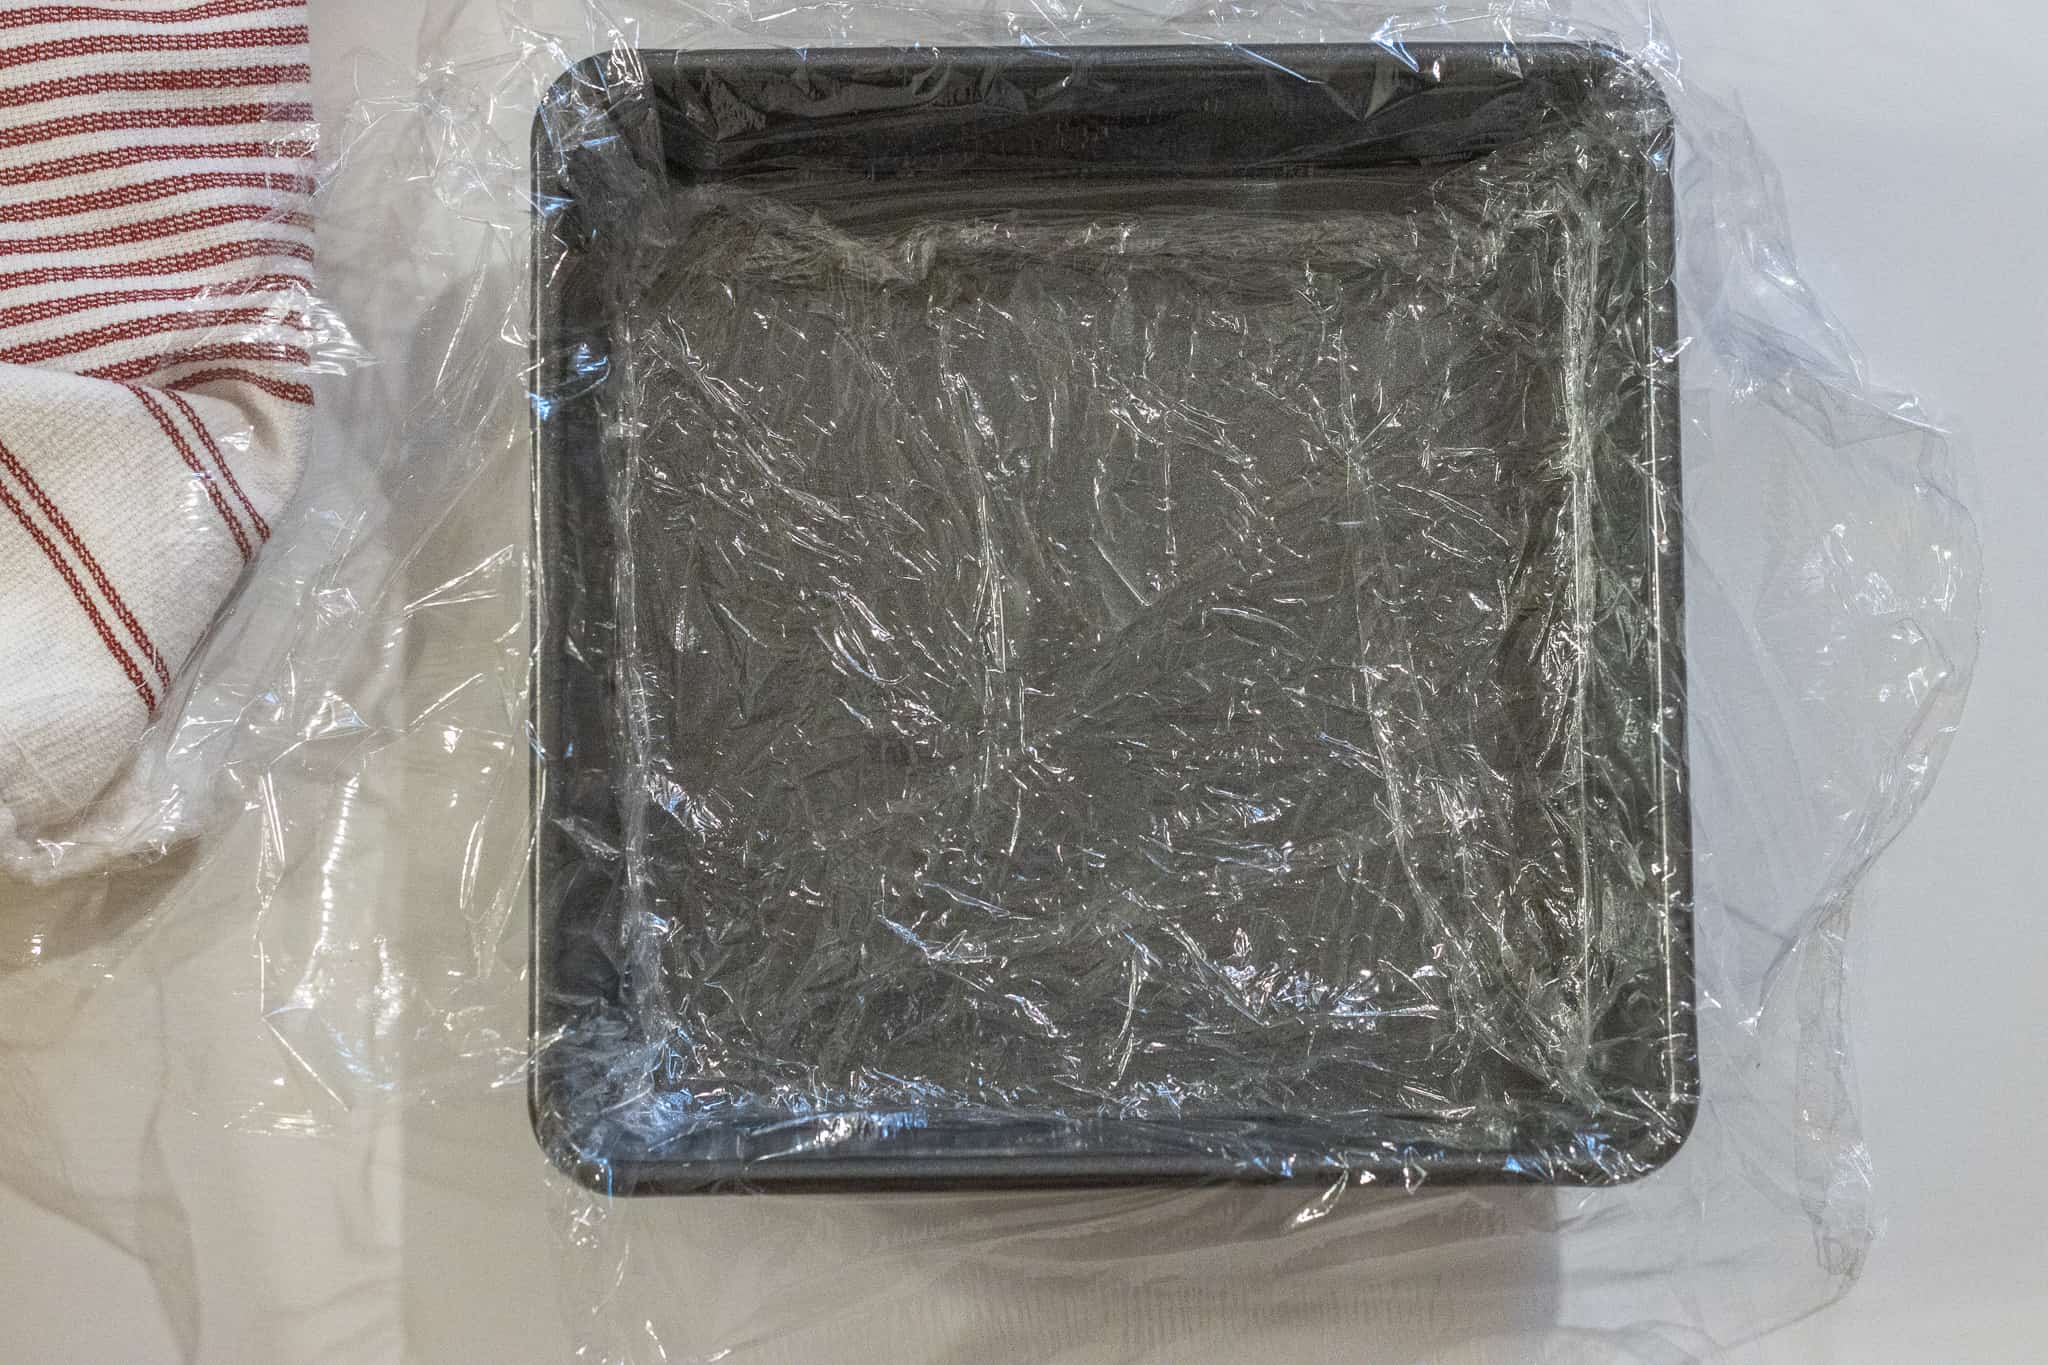
First, prepare a 9×9 baking dish with two strips of plastic wrap. Lay the first piece across leaving several inches on either side. Repeat with the second strip going in the opposite direction.
This will make it easier to flip the cake out onto a serving tray later.
Step 2:
Next, prepare the pumpkin mixture by stirring together the canned pumpkin purée, cinnamon, ginger, nutmeg, and salt.
Step 3:
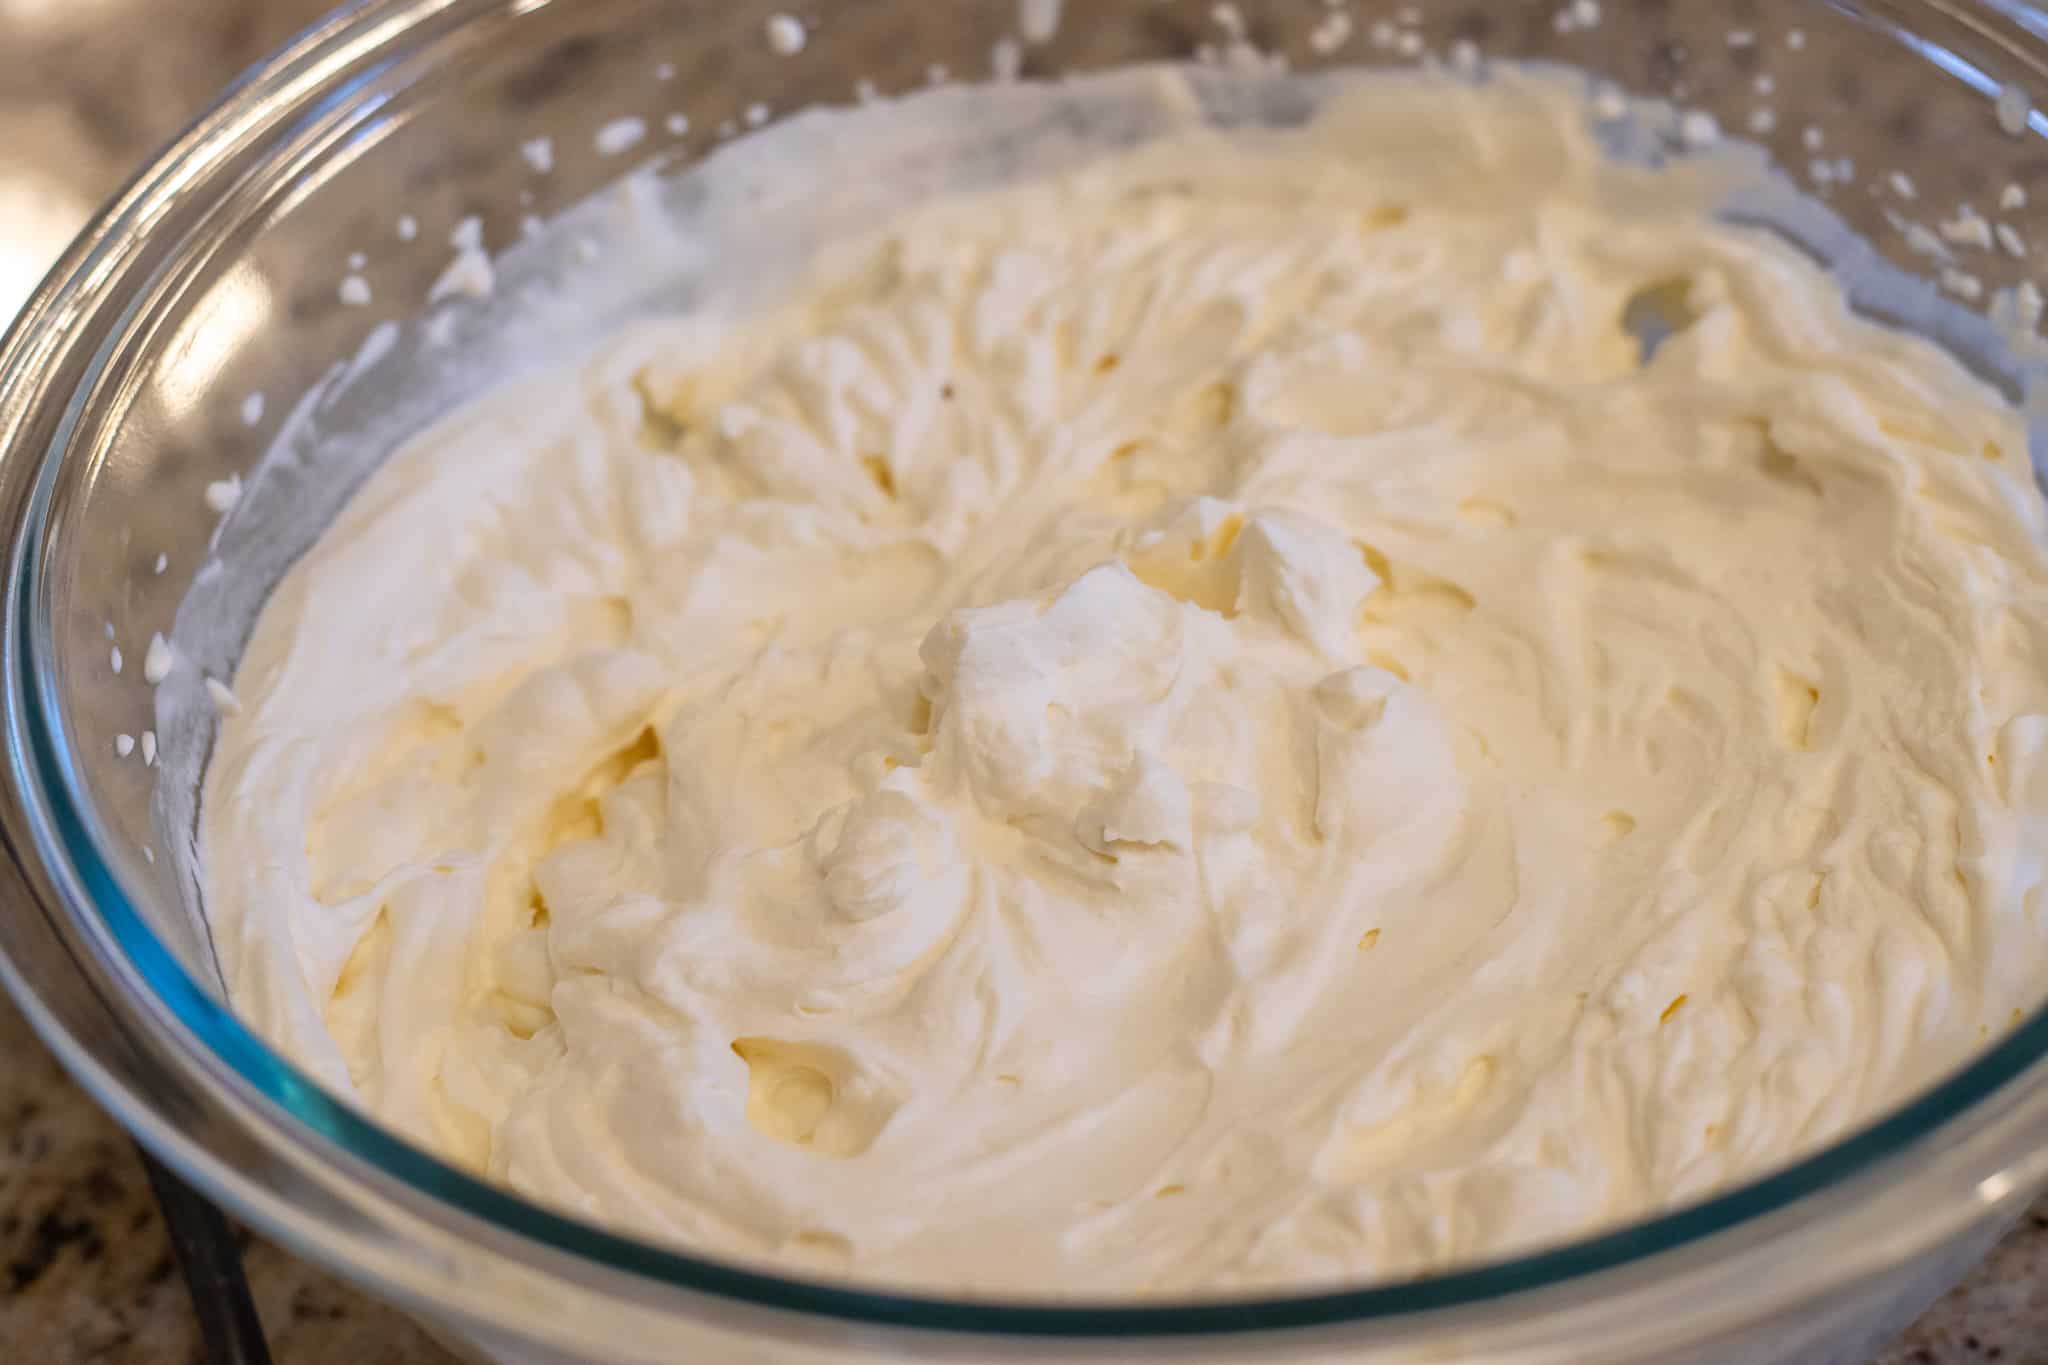
Then, prepare the whipped cream by adding the heavy whipping cream, powdered sugar, and vanilla to a bowl. Using an electric whisk, start on low then increase to high speed and mix until stiff peaks form.
Be careful not to overmix the whipped cream into butter!
Step 4:
Scoop half of the whipped cream into the pumpkin mixture and gently fold it in using a spatula.
Then, gently fold in the second half of the whipped cream just until everything is combined.
Step 5:
Note on Assembling the Cake: This cake is built upside down so that when we flip the cake out onto the serving tray the right side will be up.
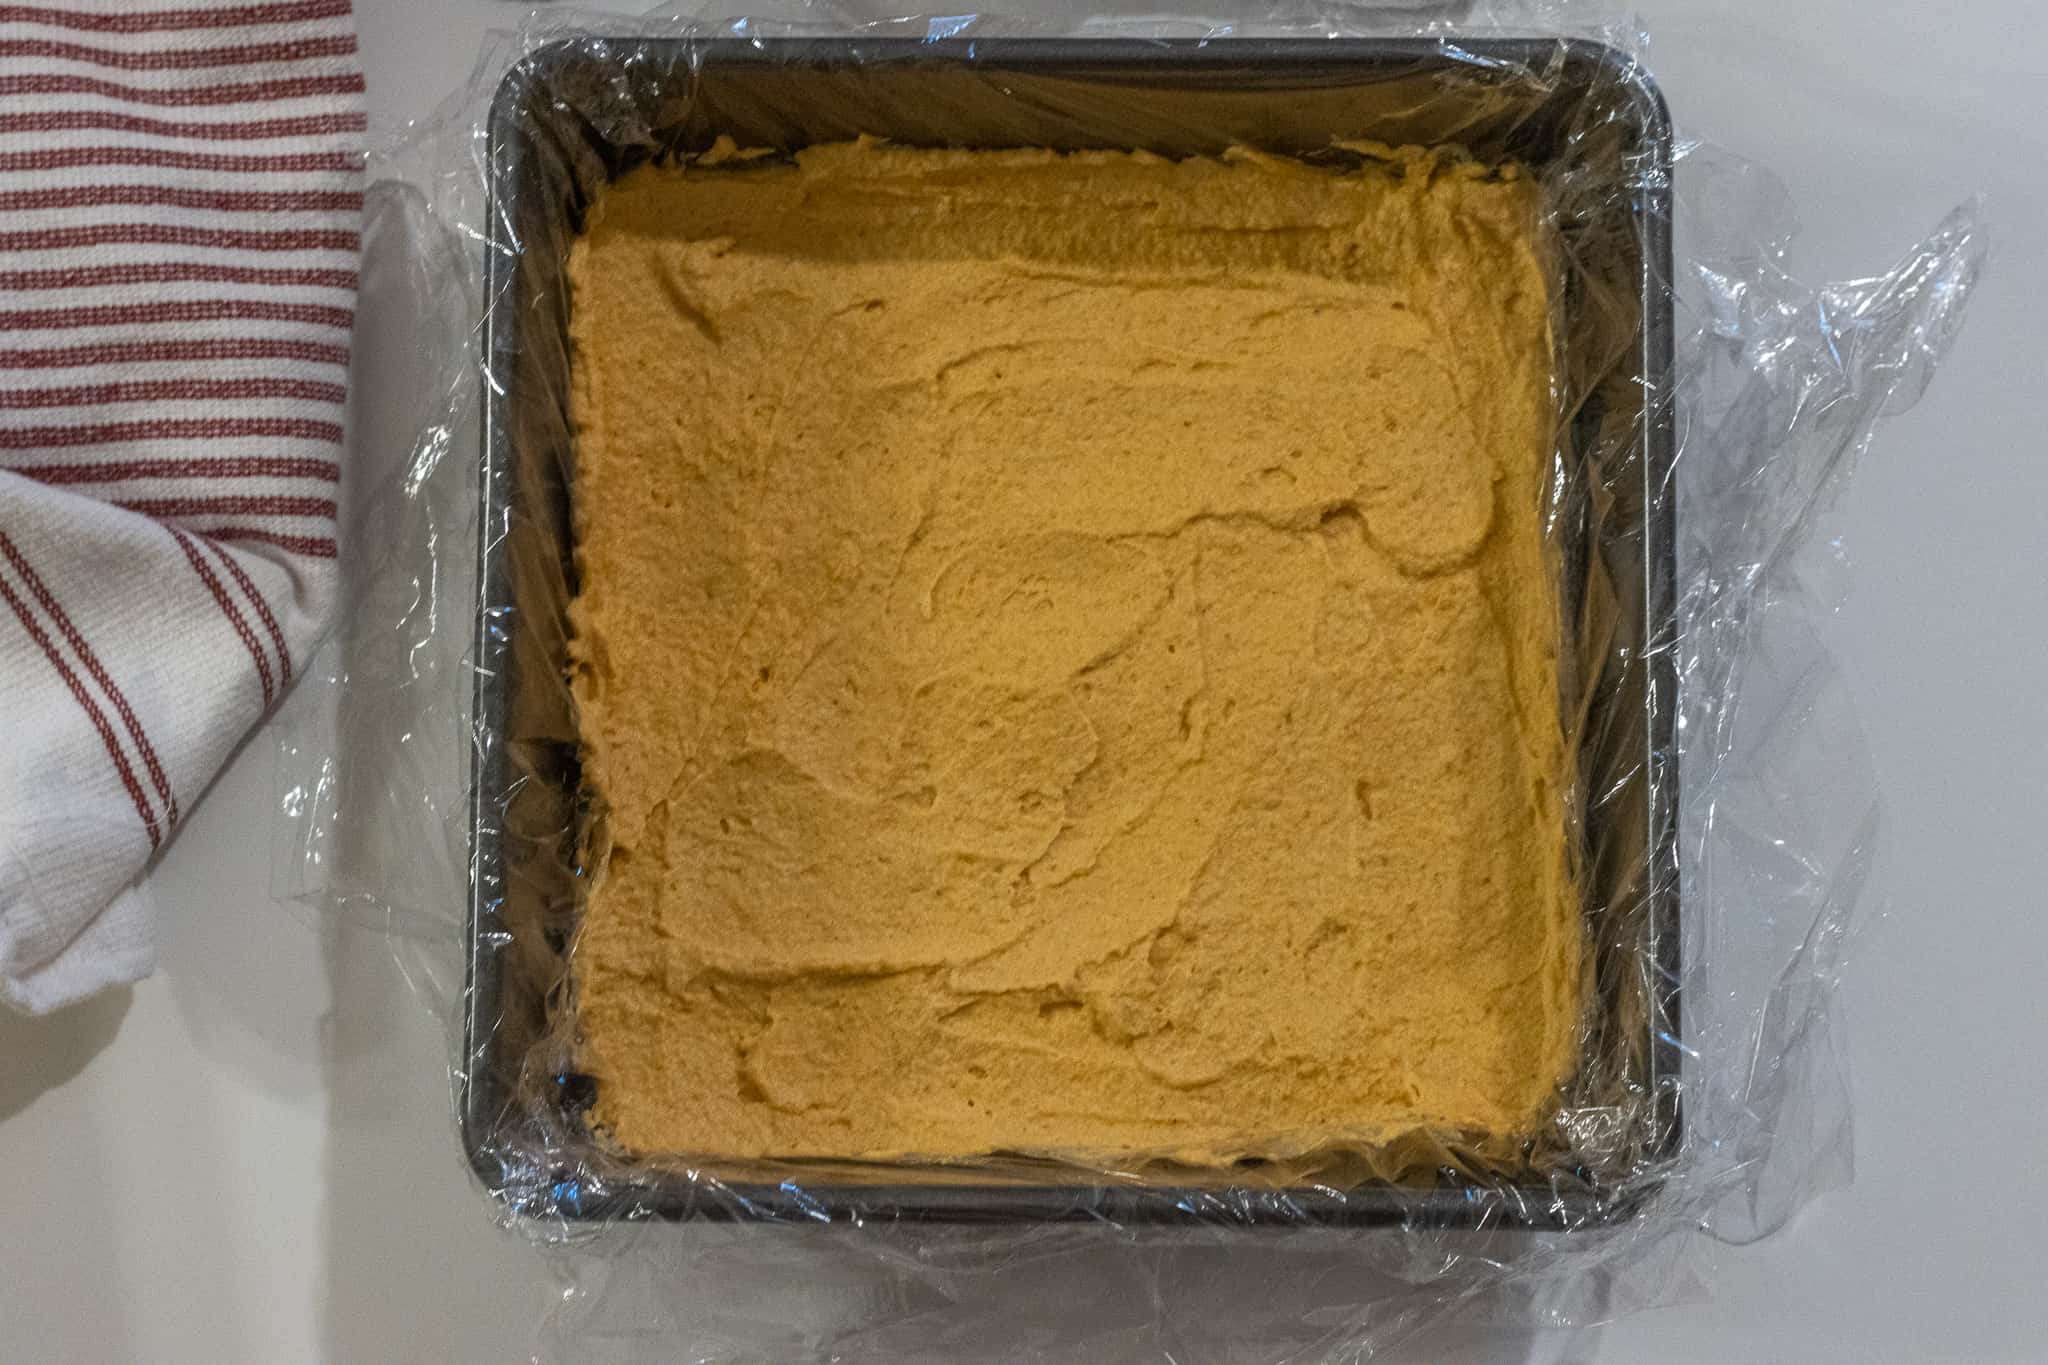
First, spoon about 1/3 of the whipped pumpkin mixture into the bottom of the lined pan. Use a spoon to spread it out as evenly as possible.
Step 6:
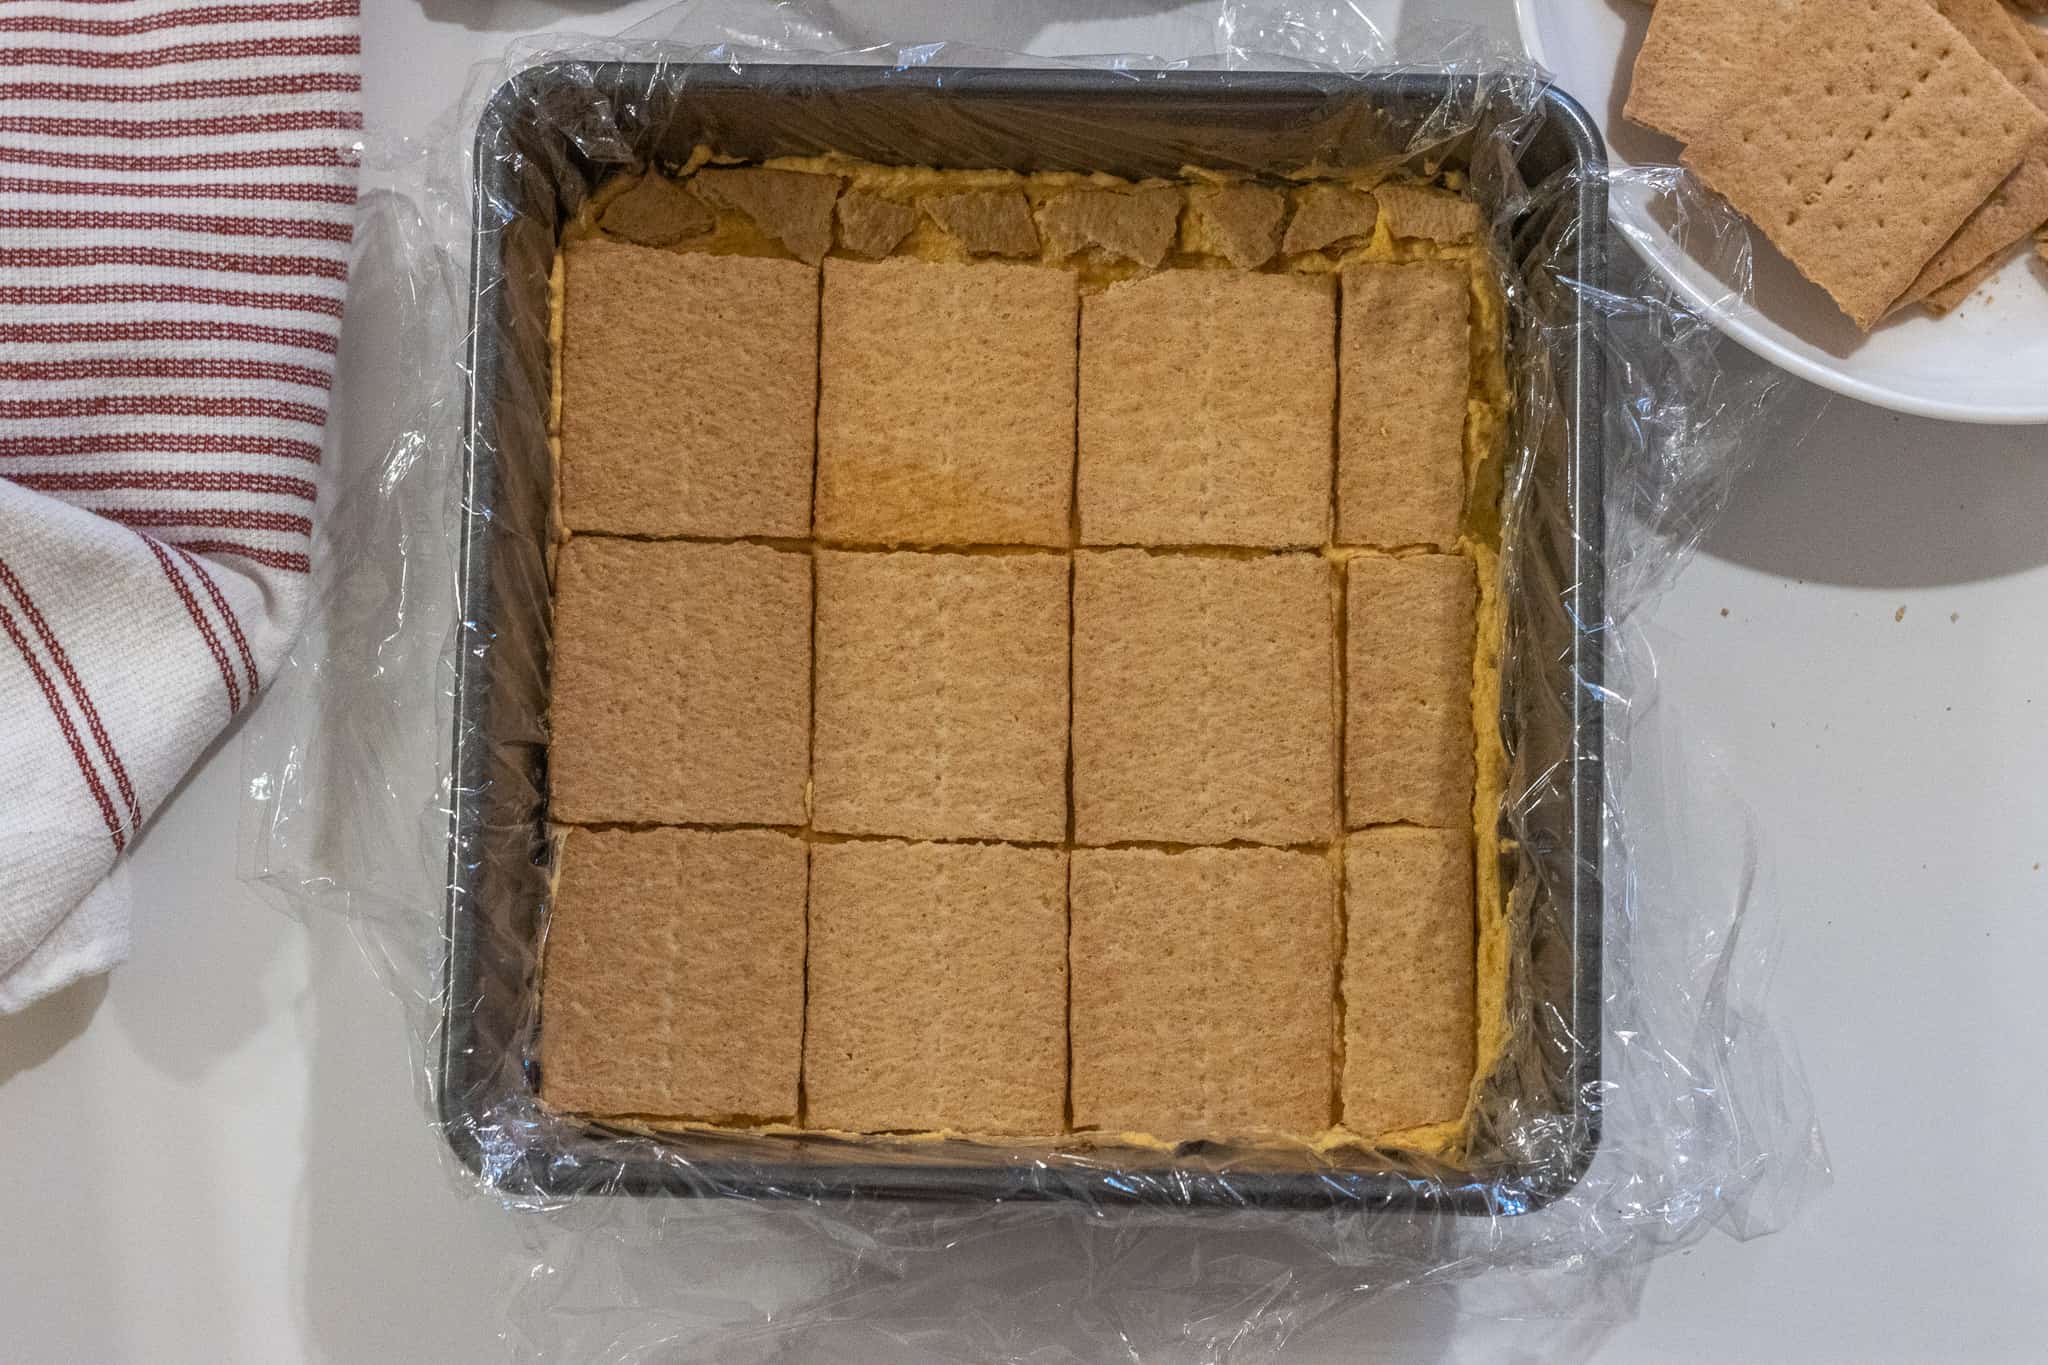
Then, add a layer of graham crackers. Try to get an even flat layer, even if you have to break pieces apart.
Step 7:
Next, spoon in another 1/3 of the whipped pumpkin.
Step 8:
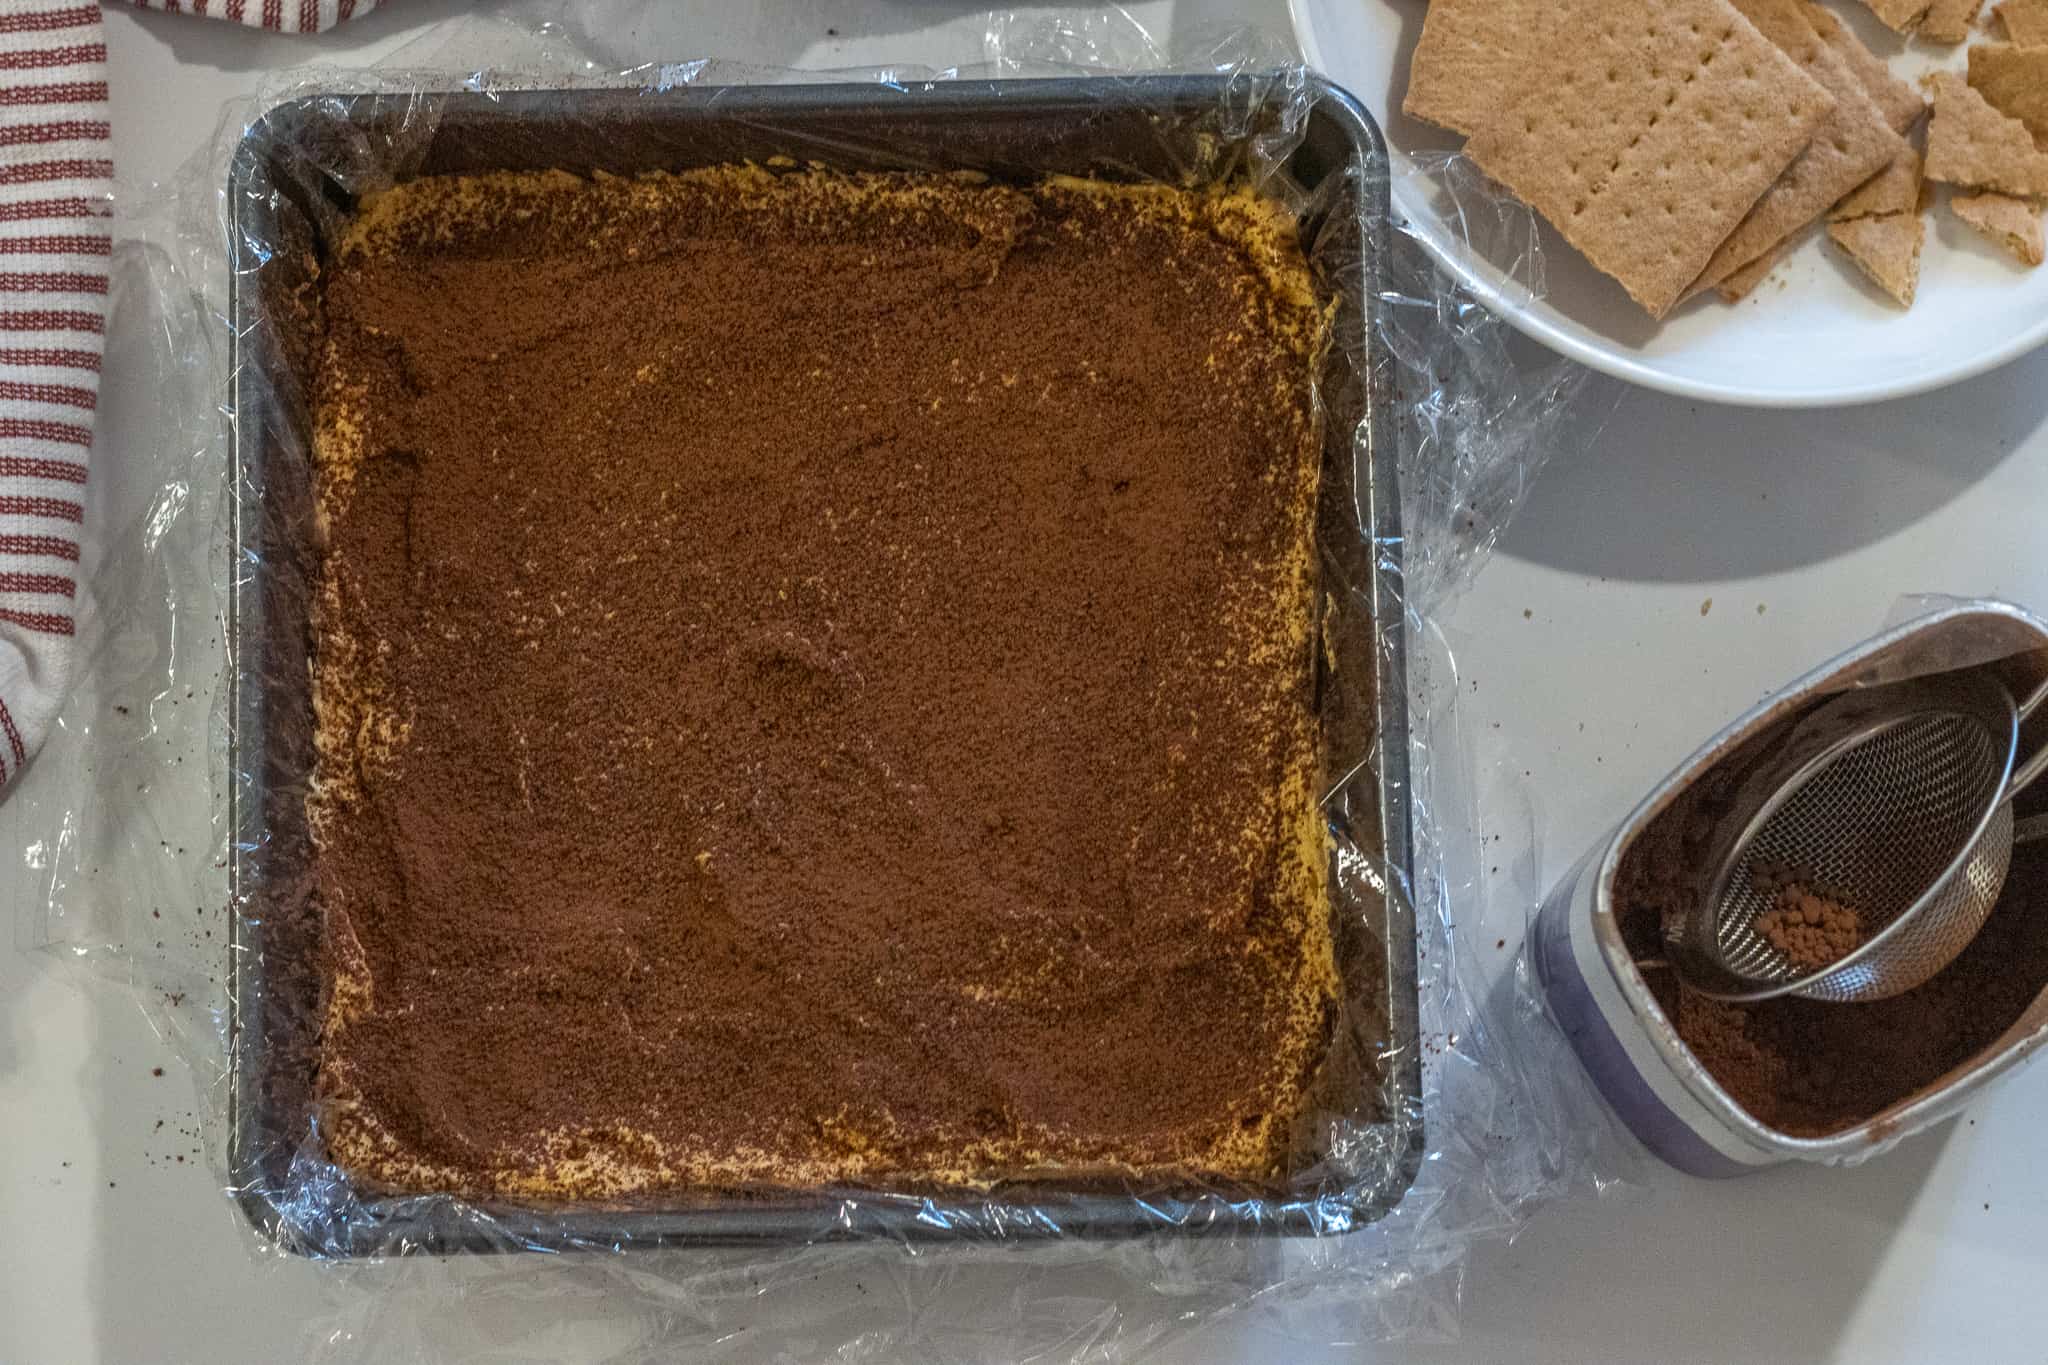
Then, using a fine-mesh sieve, sprinkle on an even layer of cocoa powder.
Step 9:
Then, add another layer of graham crackers, followed by the last 1/3 of whipped pumpkin, and another layer of cocoa powder.
Step 10:
Finally, place the last layer of graham crackers.
Fold the plastic wrap over the top and place the cake into the fridge. Allow it to chill for at least 24 hours.
Assembling the Layers Recap:
Whipped pumpkin, graham crackers, whipped pumpkin, cocoa powder, graham crackers, whipped pumpkin, cocoa powder, graham crackers. Cover with plastic wrap and refrigerate for 24 hours.
Serving the Pumpkin and Cocoa Icebox Cake
When you are ready to serve, unfold the plastic wrap, lay a serving tray on top of the cake, then flip the whole thing over.
Gently peel off the plastic wrap and add one final layer of cocoa powder over the top.
How to Store Leftover Icebox Cake
You’ll want to keep any leftovers in the fridge in an airtight container.
Be sure to eat them up within 2 to 3 days.
Other Desserts You’ll Love!
Mixed Berry Sheet Cake with Whipped Mascarpone Frosting
Double Chocolate Pretzel Cookies with Caramel Drizzle
Pumpkin Cake with Cream Cheese Frosting
Did You Make This Recipe?
I’d love to hear about it! Please leave a star rating ⭐️ ⭐️ ⭐️ ⭐️ ⭐️ and comment below!
Let’s Get Social!
I love seeing your photos! If you make this recipe don’t forget to mention @ThisHomeKitchen and tag #thishomekitchen on Instagram!
You can also follow me on Pinterest, Facebook, and Youtube!
Subscribe to My Newsletter!
Get my newest recipes, kitchen tips and tricks, and the latest news right in your inbox!
Pumpkin Icebox Cake
Ingredients
- 15 ounce pumpkin purée not pumpkin pie filling
- 2 teaspoons cinnamon
- 3/4 teaspoon ground ginger
- 1/2 teaspoon nutmeg preferably freshly grated whole nutmeg
- 1/4 teaspoon salt
- 2 cups heavy whipping cream
- 3/4 cup powdered sugar
- 1 teaspoon vanilla
- 30 graham crackers
- 3 tablespoons cocoa powder
Instructions
- Line a 9×9 inch baking dish with plastic wrap. Lay one strip across leaving several inches on either side. Lay another strip of plastic wrap going the opposite way, again leaving several inches.
- In a large bowl, stir together the pumpkin purée, cinnamon, ginger, nutmeg, and salt.
- In another large bowl, add the heavy whipping cream, powdered sugar, and vanilla. Using an electric whisk, start on low until everything is combined then increase the speed to high. Whisk until stick peaks form.
- Gently fold in half of the whipped cream into the pumpkin mixture. Then gently fold in the other half just until everything is combined. Be careful not to over stir and deflate the whipped cream.
- To the lined pan, add 1/3 of the whipped pumpkin. Then, place one layer of graham crackers until you have an even layer. Break pieces apart if needed.
- Add another layer of whipped cream. Then, using a fine-mesh sieve, sprinkle 1 tablespoon of cocoa powder evenly over the whipped pumpkin. Top with another layer of graham crackers.
- Finally, add the rest of the whipped pumpkin, followed by 1 tablespoon of cocoa powder, and one last layer of graham crackers. Fold the plastic wrap over the top of the cake to cover it.
- Refrigerate for 24 hours before serving.
- When you are ready to serve, unfold the plastic wrap. Place a serving tray over the top and flip the whole thing. Gently remove the plastic wrap from the cake.
- Again using the fine-mesh sieve, sprinkle 1 tablespoon of cocoa powder evenly over the top.
Notes
- Store the icebox cake in an airtight container in the fridge.
- Eat it up within 2 to 3 days.