Mini Apple Galettes
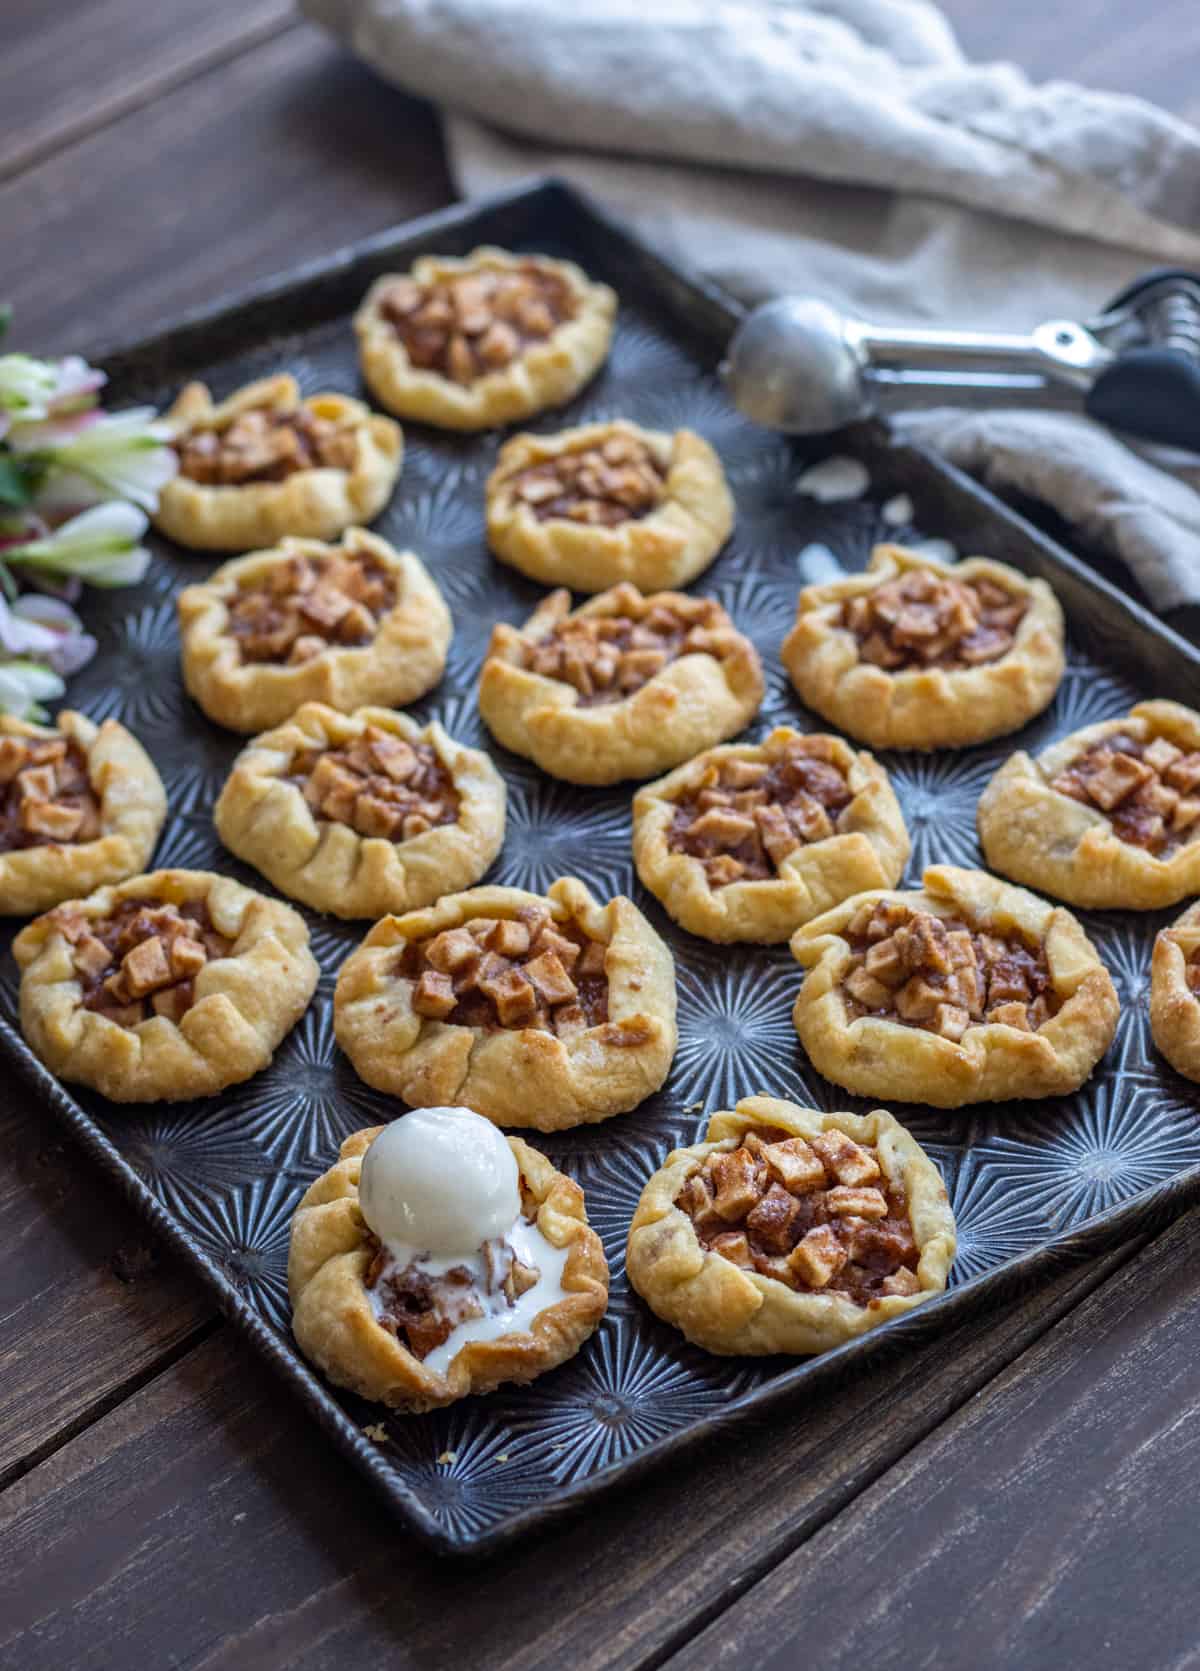
These rustic Mini Apple Galettes are an individual portion-sized version of the classic French dessert. Cinnamon-sugar spiced apples are nestled inside flaky mini buttermilk crusts. Serve them warm with vanilla ice cream for a dessert everyone will love!

Would you like to save this recipe?
There is nothing quite like apple pie. Flaky buttery pie crust filled with the classic flavors of sweet cinnamon-spiced apple filling, and best served warm with a cold creamy scoop of vanilla ice cream. It’s the perfect treat!
These mini galettes take the classic French dessert and turns them into charming little individual apple galettes.
Why You’ll Love This Recipe
- The buttermilk pie crust is extra buttery and flaky!
- The apple filling is sweet and spiced with cinnamon
- Baking straight from the freezer means you can make these in advance and have this delicious dessert on hand whenever you want them
Ingredients
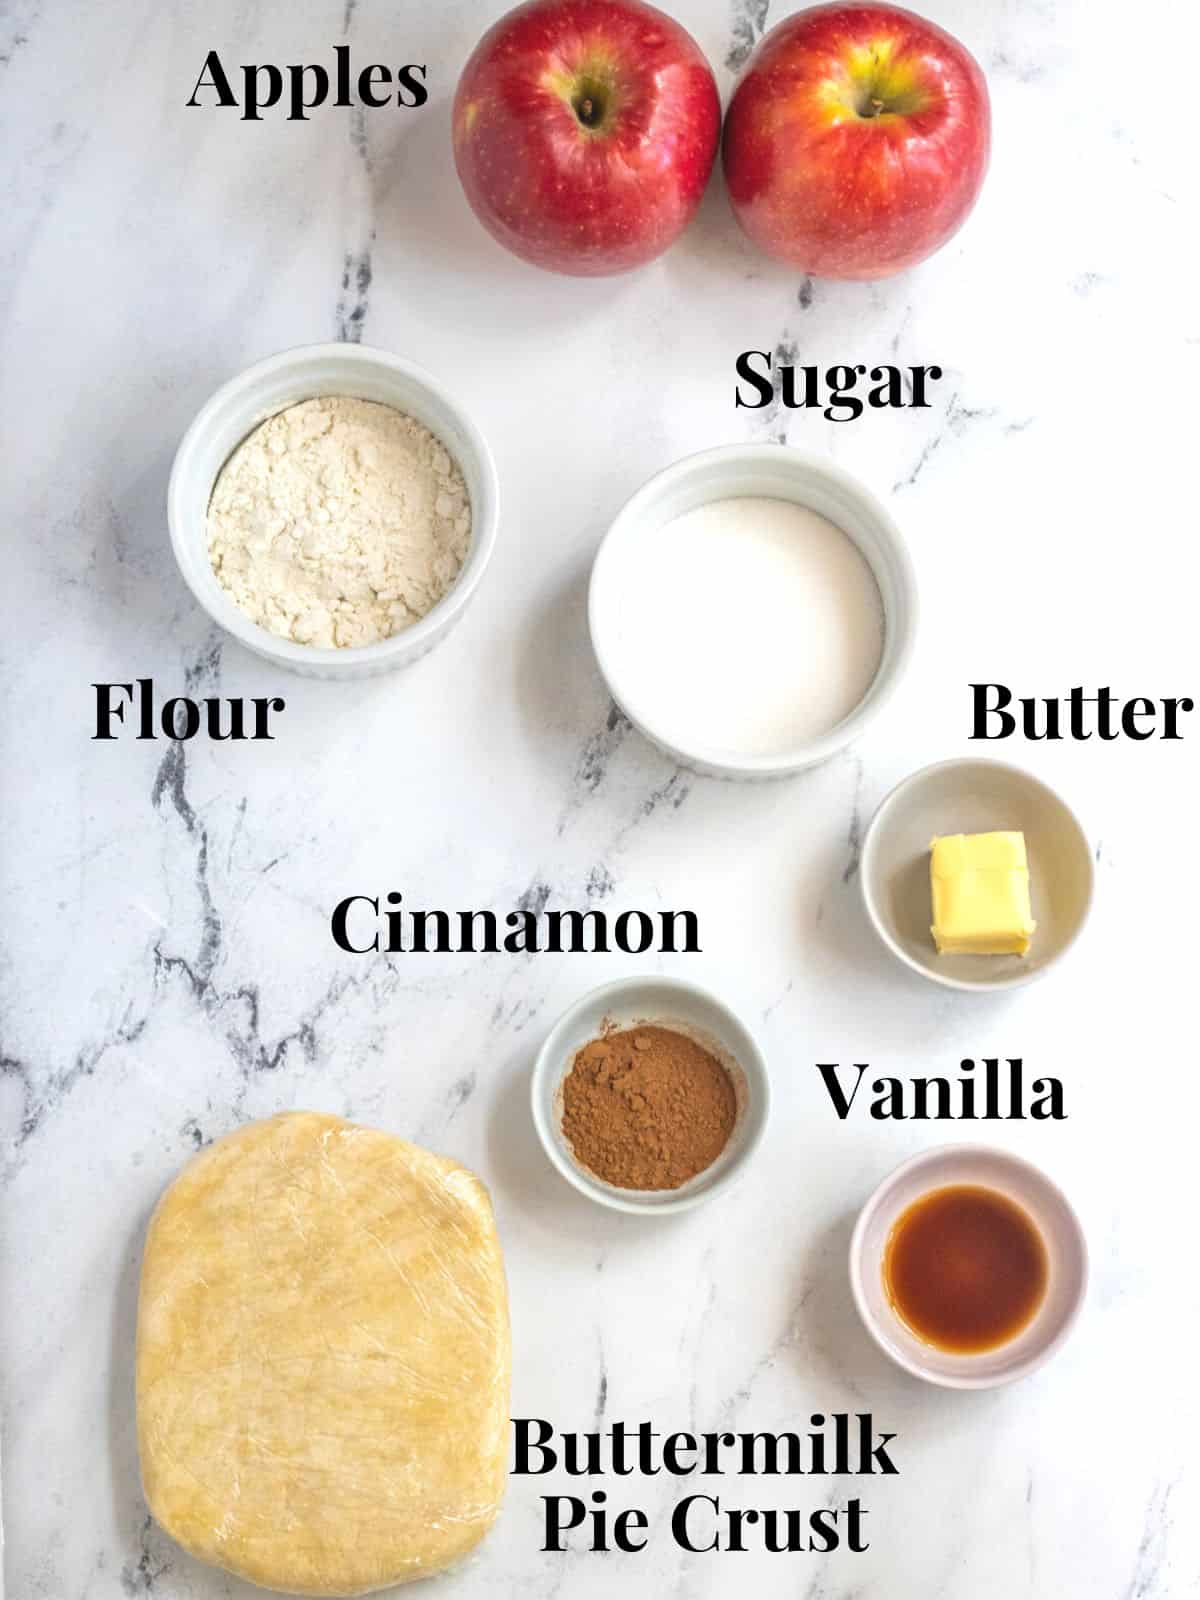
Ingredient Notes
Buttermilk Pie Crust – I like to use my Buttermilk Pie Crust recipe for these galettes. The buttermilk strengthens the structure of the crust and leads to fewer blowouts, a common challenge with galettes.
Apples – I suggest using an apple that keeps a bit of its structure when baked and is both sweet and tart, such as Pink Lady or Honeycrisp. If you like more tartness, Granny Smith apples are a good choice.
Sugar – Adds sweetness to the apple filling.
Flour – Adding all-purpose flour to the spice mixture helps to thicken the filling as it bakes and the apples release their juices.
Cinnamon – Adds a spiced flavor to the apple filling.
Step By Step Instructions
Note: Full list of ingredients, their amounts, and instructions can be found in the recipe card below.
Step 1: Making the Crust
To start, make the Buttermilk Pie Crust (follow this link for more detailed information on making this crust).
First, in a medium bowl, whisk together the flour, sugar, and salt.
Step 2:
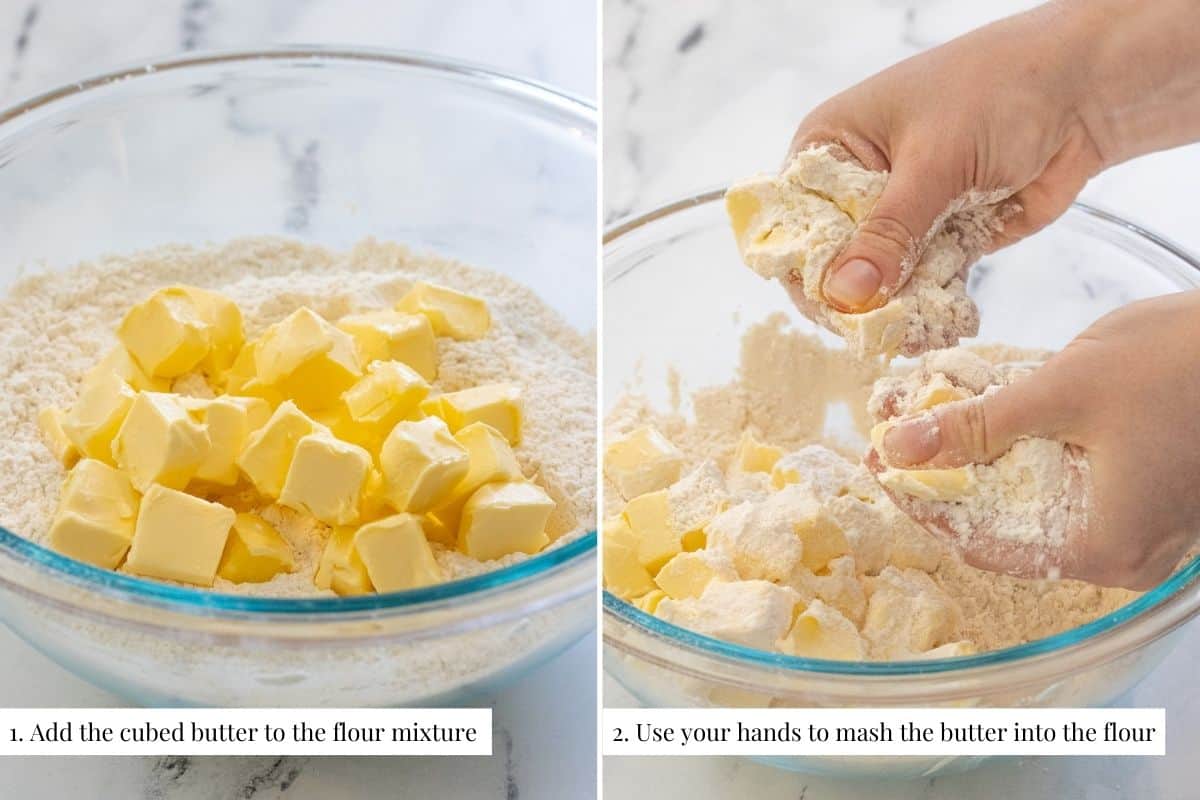
Then, add the cold butter cubes to the flour mixture.
Next, use your fingers to press the butter into planks then toss with the flour. Continue this process until you have a variety of butter pieces ranging from pea size to walnut-half size.
Note: I recommend not using a food processor or pastry cutter because the butter pieces become too small. For the best results, use your hands to break down the butter.
Step 3:
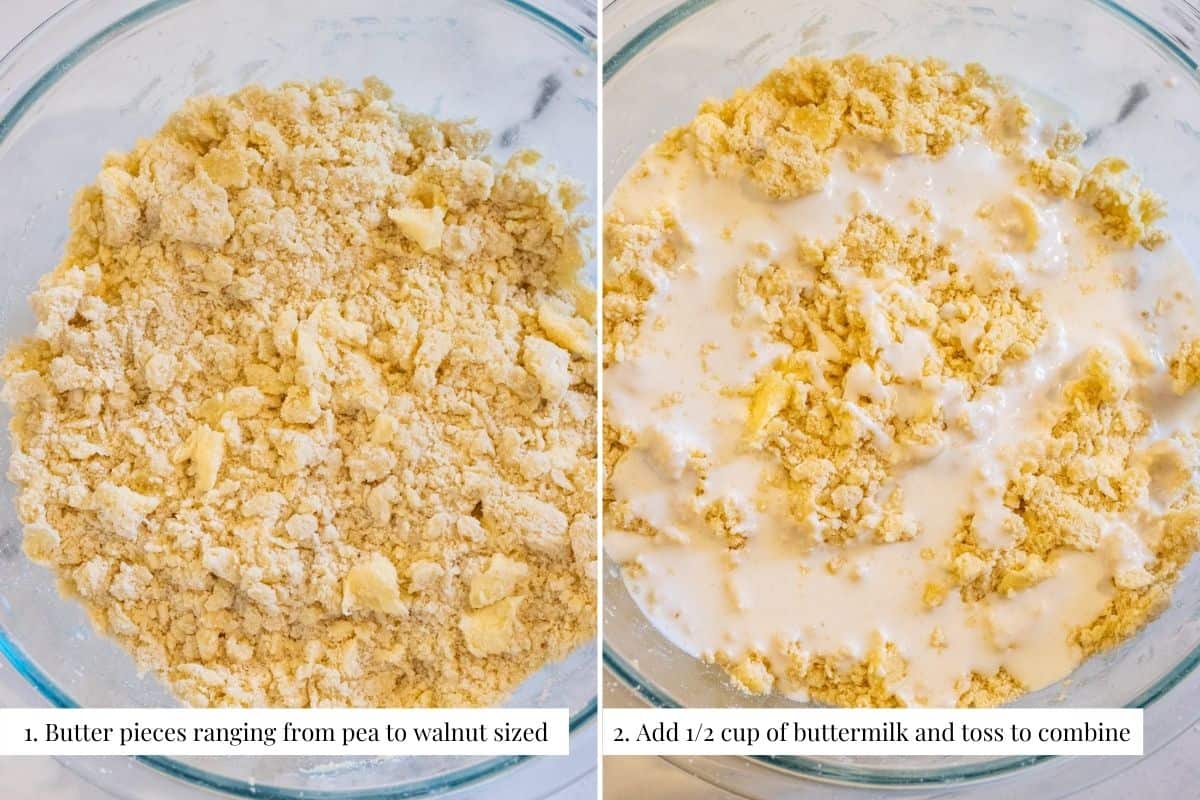
Next, add the buttermilk and mix until combined. If the dough clumps together easily, it has enough buttermilk. If it crumbles, add another teaspoon until it does come together.
Step 4:
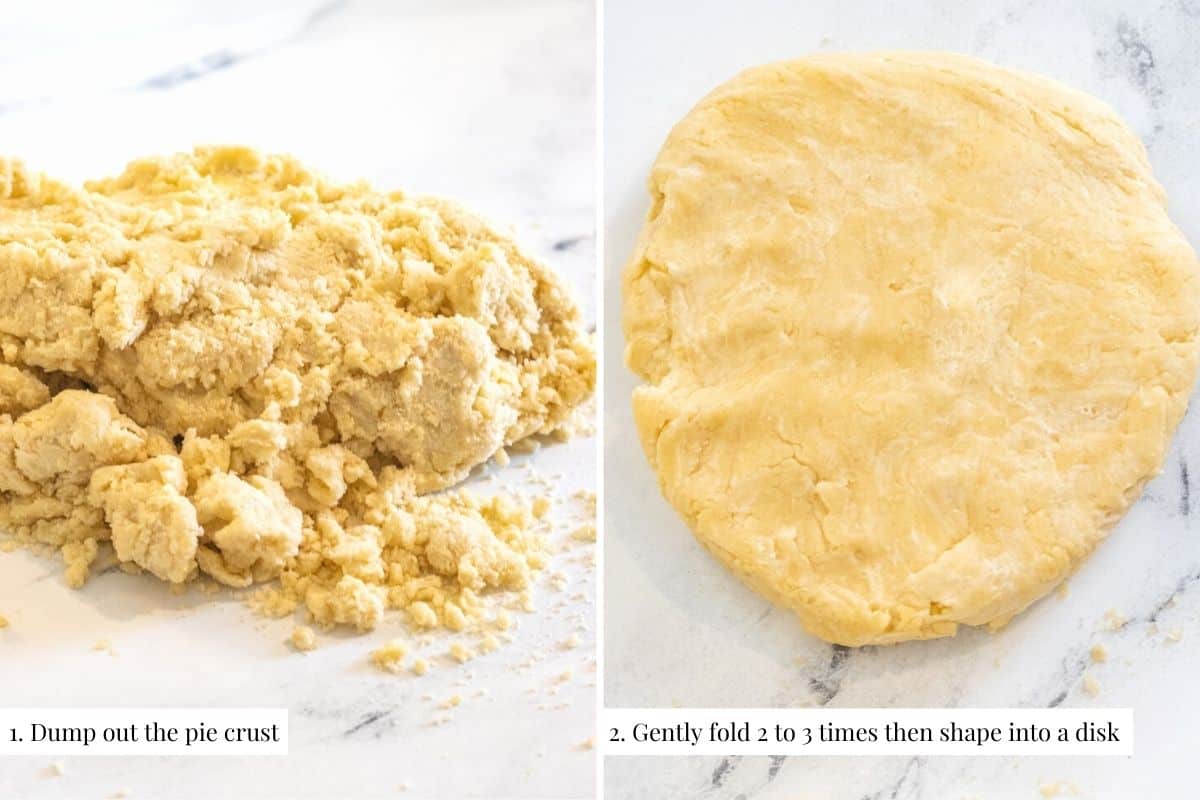
Dump the dough out onto a lightly floured work surface and gently knead it together by folding it over itself 2 to 3 times. Then, shape it into a flat round disk.
Wrap the dough with a towel and chill while preparing the apples.
Step 5: Preparing the Apple Filling
In a bowl, whisk together the sugar, flour, and cinnamon.
Step 6:
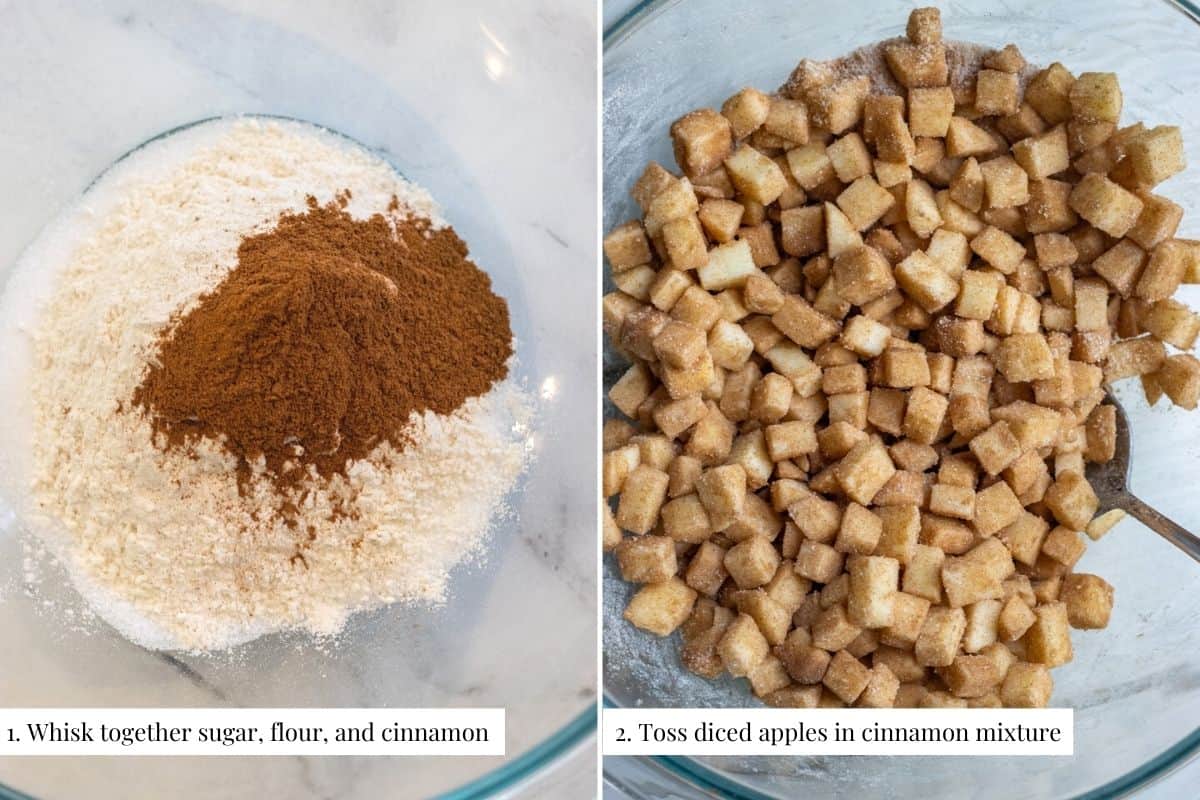
Peel, core, and cut the apples into small 1/2-inch cubes.
Then, toss the apples with the cinnamon-sugar mixture and the vanilla extract. Set aside.
Step 7: Assembling the Galettes
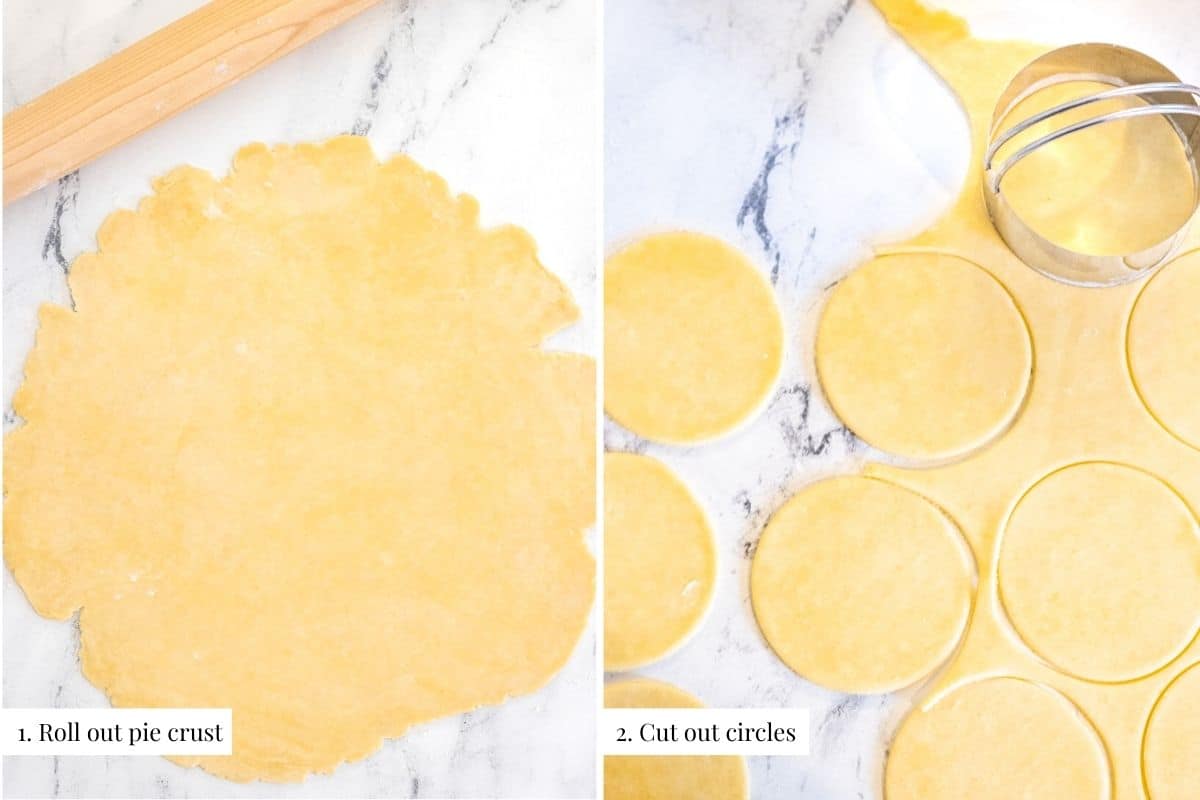
Using a rolling pin, roll the dough out until it is 1/8th inch thick and about 12 inches across.
Then, use a 4-inch biscuit cutter to cut circles out of the dough. You should be able to get 12 dough rounds.
Press the leftover dough together, roll it back out, and cut out another 4 rounds.
Note: You may still have more dough that you can roll out and make more cutouts. However, the dough may start to become a bit tougher. You can also cut the remaining dough into decorative shapes like leaves to place around the edges before baking.
Step 8:
Next, place about 1 tablespoon of spiced apples in the center of one of the dough round leaving about 1/2 an inch around the edges.
Step 9:
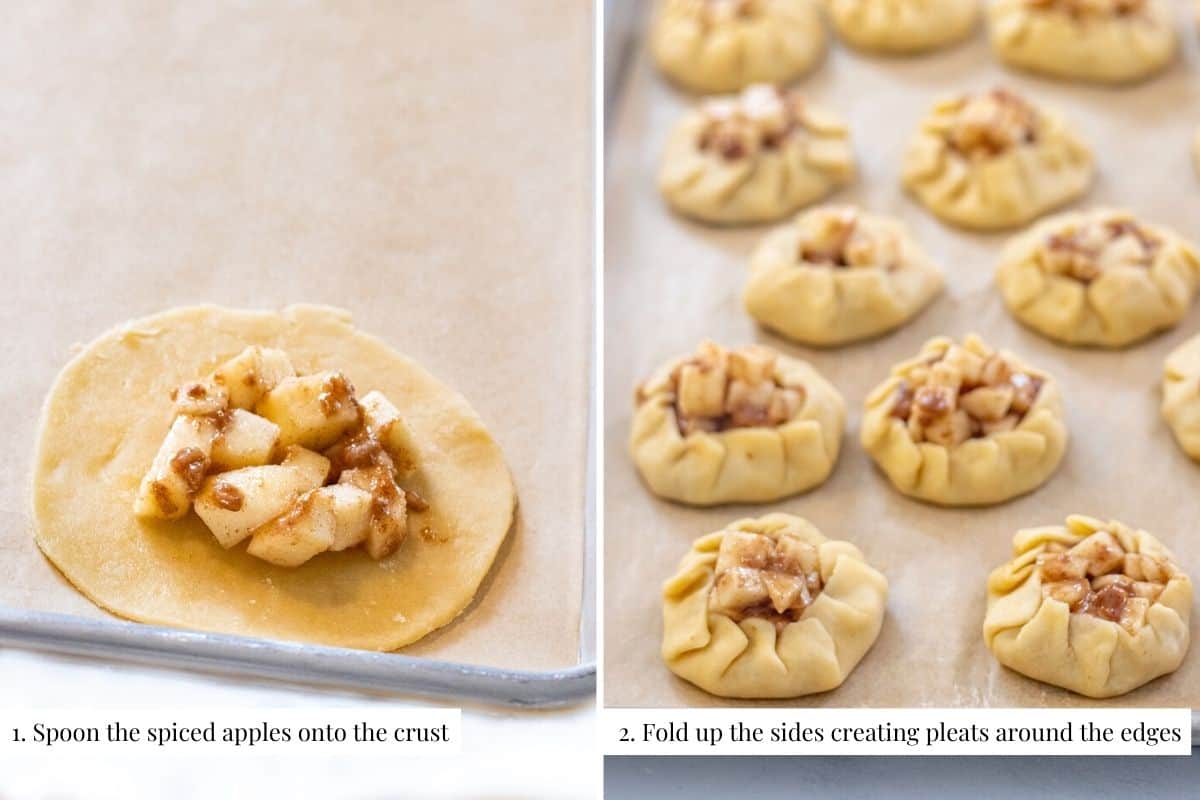
Then, fold up the sides pleating as you go. Gently press the pleats down to secure. Transfer the mini galette to a baking sheet lined with parchment paper.
Continue until all of the galettes have been made.
Step 10:
Freeze for at least 1 hour to overnight.
Step 11: Baking the Galettes
Preheat the oven to 375 degrees F. Melt the butter in the microwave or in a saucepan on the stove.
Transfer the frozen galettes to another baking sheet lined with parchment paper. (This is important because the frozen baking sheet may warp in the hot oven.)
Step 12:
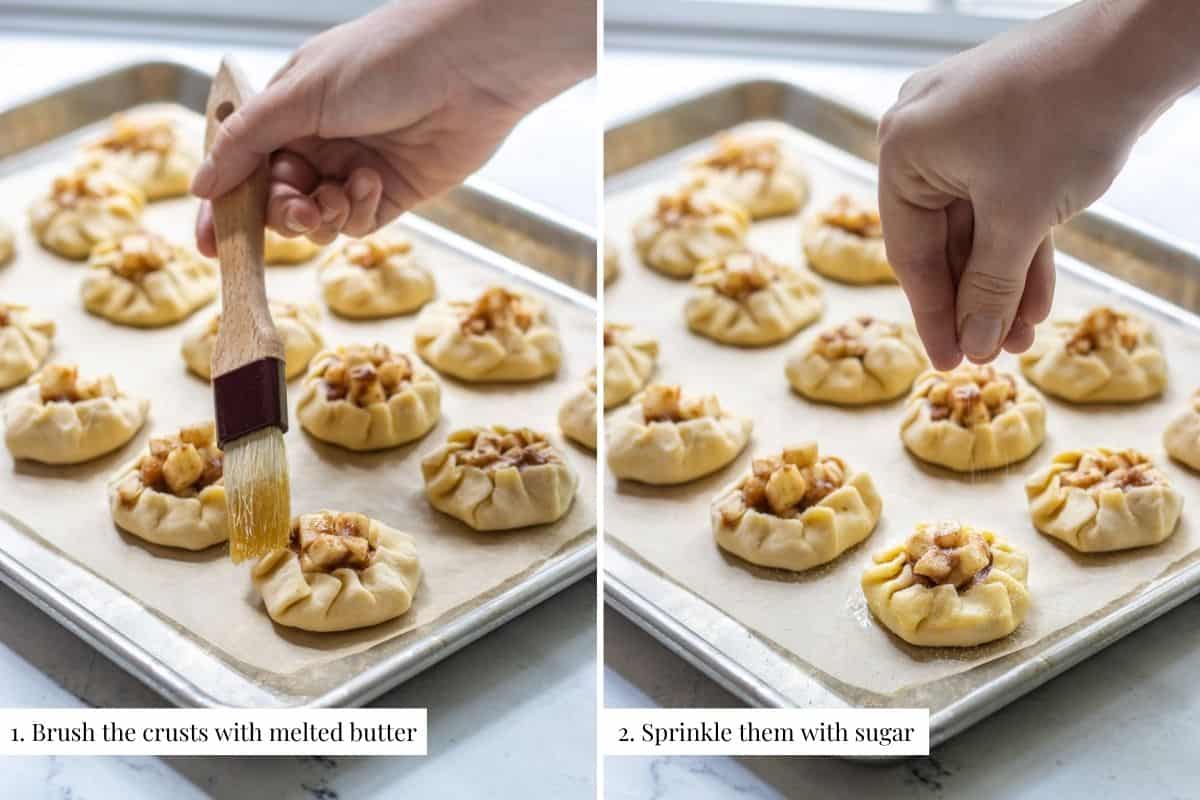
Brush one galette with the melted butter then immediately sprinkle with sugar. Continue until they are all brushed with butter and have sugar sprinkled on them.
Step 13:
Bake for 40 to 50 minutes. The crust should be golden brown and the apples should be cooked through and softened.
Allow them to cool about 5 minutes before serving.
These Mini Apple Galettes are best served warm with a scoop of vanilla ice cream.
Equipment
4″ Biscuit Cutter
Pastry Brush
Tips & Tricks
- As you assemble the galettes, keep a towel nearby to wipe off your hands. It’s easy to get the cinnamon mixture from the apples on them and the towel helps with quick clean-up between galettes
- You can make decorative cutouts from the dough scraps and place them around the edges or on top
Ideas For Serving
Of course, you can serve these as they are and they’ll still be the perfect dessert.
However, if you want to take them over the top, here are some suggestions
- Served warm with a scoop of ice cream
- Topped with freshly whipped cream
- Drizzled with homemade salted caramel sauce
Substitutions & Variations
- Don’t have buttermilk? Use my All Butter Pie Crust recipe instead
- Don’t have much time to make your own pie crust? Use a premade pie crust for ease
- The fruit filling can also be switched up. Berries make a great option because of their smaller size
Storage & Reheating
Storing Leftovers
The mini apple galettes can be kept in an airtight container at room temperature for up to 2 days.
They can also be kept in an airtight container in the fridge for up to 1 week.
Reheating Leftovers
To reheat, place on a baking sheet and bake at 350 degrees for about 5 minutes.
Longterm Storage
You can also freeze the unbaked galettes for up to 3 months.
Follow the instructions through freezing them for 1 hour then transfer the frozen galettes to a freezer bag.
When you’re ready to bake them, just follow the rest of the directions. Now, you have single-serve apple pies ready to go whenever you need them!
More Recipes You’ll Love!
Old Fashioned Peanut Butter and Chocolate Pie
Did You Make This Recipe?
I’d love to hear about it! Please leave a star rating ⭐️ ⭐️ ⭐️ ⭐️ ⭐️ and comment below!
Let’s Get Social!
I love seeing your photos! If you make this recipe don’t forget to mention @ThisHomeKitchen and tag #thishomekitchen on Instagram!
You can also follow me on Pinterest, Facebook, and Youtube!
Subscribe to My Newsletter!
Get my newest recipes, kitchen tips and tricks, and the latest news right in your inbox!

Mini Apple Galettes
Ingredients
Buttermilk Pie Crust
- 6 ounces all-purpose flour (1 1/4 cup)
- 1 teaspoon sugar
- 1/2 teaspoon salt
- 4 ounces unsalted butter cold
- 1/4 cup buttermilk cold
Apple Filling
- 2 medium apples
- 1/3 cup granulated sugar
- 1/4 cup all-purpose flour
- 2 teaspoons cinnamon
- 1 teaspoon vanilla extract
Assembling
- 2 tablespoons melted butter
- granulated sugar for sprinkling
Instructions
Buttermilk Pie Crust
- Cut the butter into 1/2 inch cubes. Keep the cubed butter and buttermilk in the fridge until ready to use.
- In a bowl, whisk together the flour, sugar, and salt.
- Add the cubed butter to the flour mixture and toss to coat. Using your thumbs against your index fingers, press the butter cubes into planks. Toss them with the flour as you work. Stop once you've pressed all of the butter and have a mixture of pea size to walnut-half size butter pieces.
- Add the buttermilk and mix. If the dough clumps easily, you have enough liquid. If not, add a teaspoon more buttermilk until the dough does clump easily.
- Dump the dough out onto a lightly floured surface and knead gently by folding it over itself 2 to 3 times.
- Shape the dough into a disk and wrap it in a towel. Chill the dough while you prepare the apples.
Apple Filling
- In a bowl, whisk together the sugar, flour, and cinnamon.
- Peel, core, and dice the apples into 1/2 inch cubes.
- Add the diced apples and vanilla extract to the cinnamon sugar mixture and toss to coat. Set aside.
Assembling the Galettes
- Line a baking sheet with parchment paper.
- Remove the dough from the fridge and place it on a lightly floured work surface.
- Using a lightly floured rolling pin, start in the center and roll out. Rotate and roll from the center out. Continue this until the dough is about 1/8th inch thick and about 12 inches across. (see notes #1 and #2)
- Cut 4-inch rounds out of the dough. Press the scraps together and roll back out to get another 4 rounds. (see note #3)
- Spoon 1 tablespoon of apples onto the center of one of the dough rounds leaving space around the edges.
- Fold up the edges and pleat as you go, pressing down to secure them. Transfer the mini galette to the parchment-lined baking sheet and continue with the rest of the galettes.
- Freeze the galettes for 1 hour. (see notes #4 and #5)
Baking the Galettes
- Preheat the oven to 375 degrees F.
- Transfer the frozen galettes and parchment paper to a new baking sheet. (see note #6)
- Brush one galette with the melted butter then immediately sprinkle with sugar. Continue with the rest of the galettes.
- Bake for 40 to 50 minutes, or until the crust is golden brown and the apples are softened.
- Serve warm with vanilla ice cream.
Notes
- If the dough begins to stick, add a bit more flour to the work surface and/or rolling pin.
- If the dough begins to feel warm or the butter gets too soft, transfer the dough to a baking sheet and chill in the fridge for 10 minutes before continuing.
- You’ll probably have more dough scraps but rolling out a third time can lead to tough dough. Either discard the leftovers or cut them into decorative shapes to place on top of the galettes.
- Freezing the galettes before baking them helps them keep their shape and increases the flakiness of the crust.
- At this point, you can transfer the frozen galettes to a freezer bag and keep them in the freezer for up to 3 months.
- This is important because placing the frozen baking sheet into a hot oven can cause it to warp.
Thanks for your blog, nice to read. Do not stop.