Chocolate Peanut Butter Pie
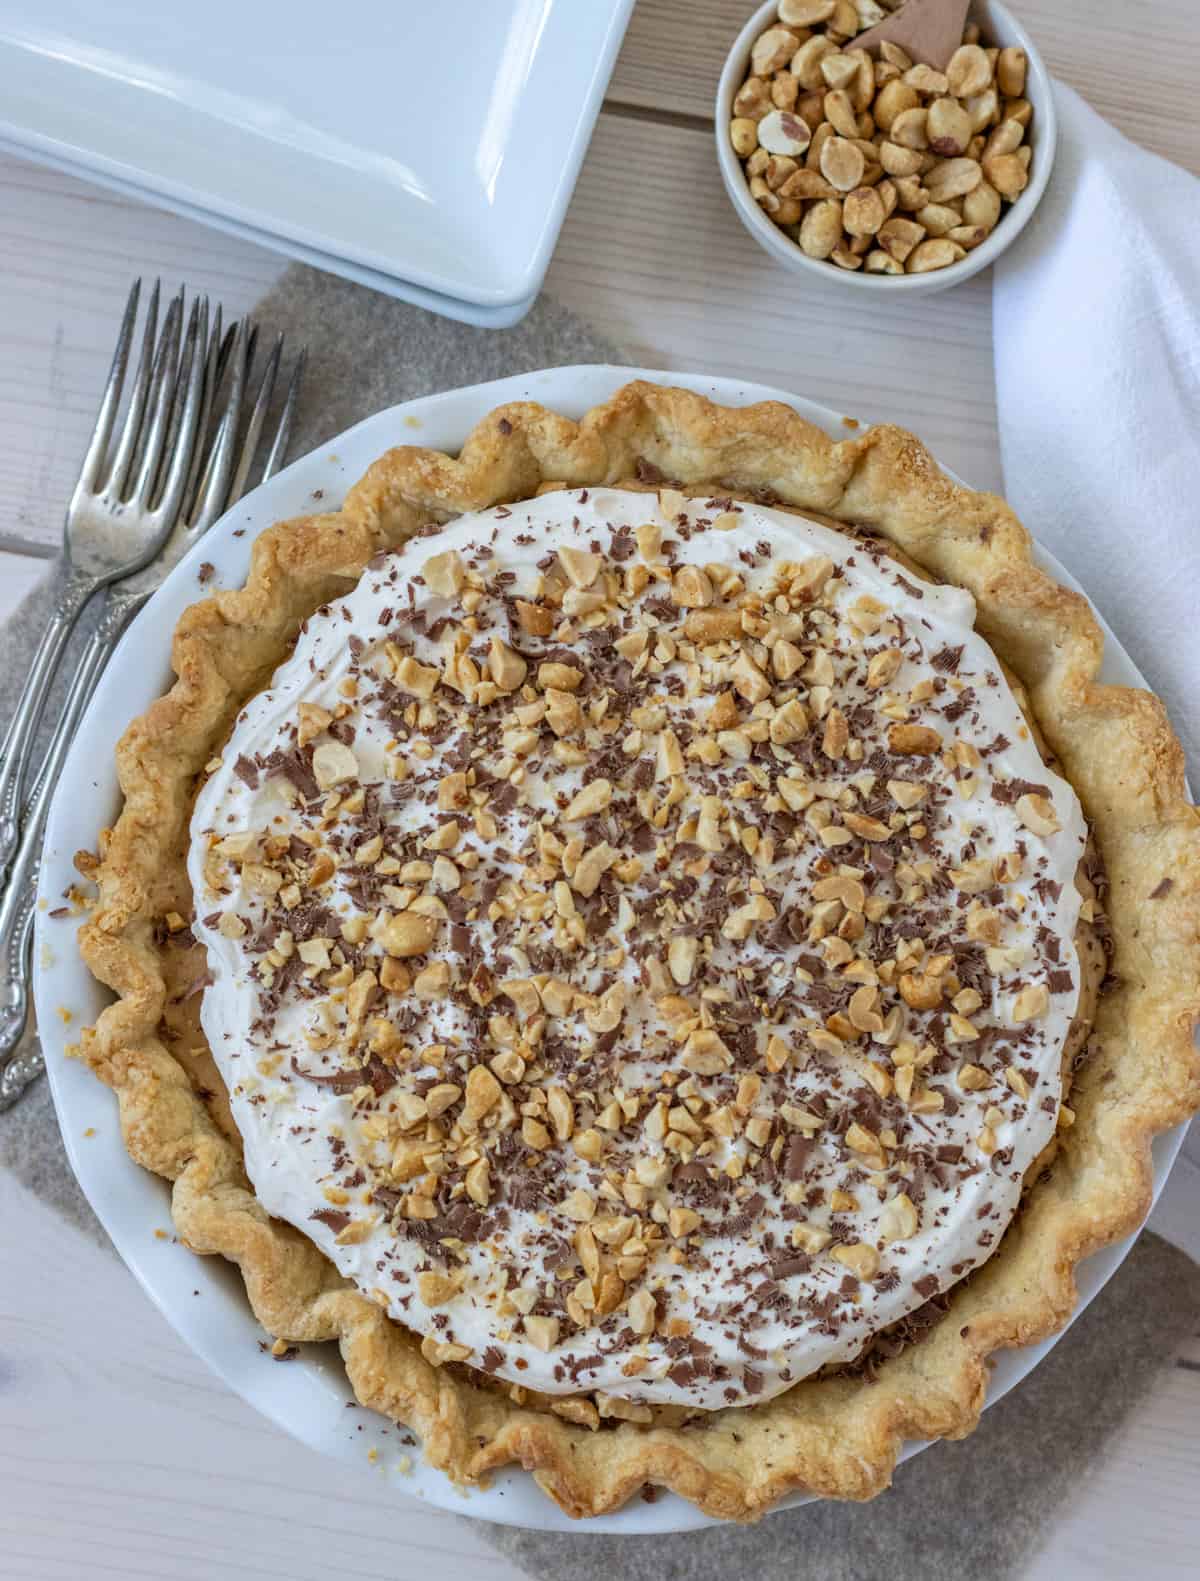
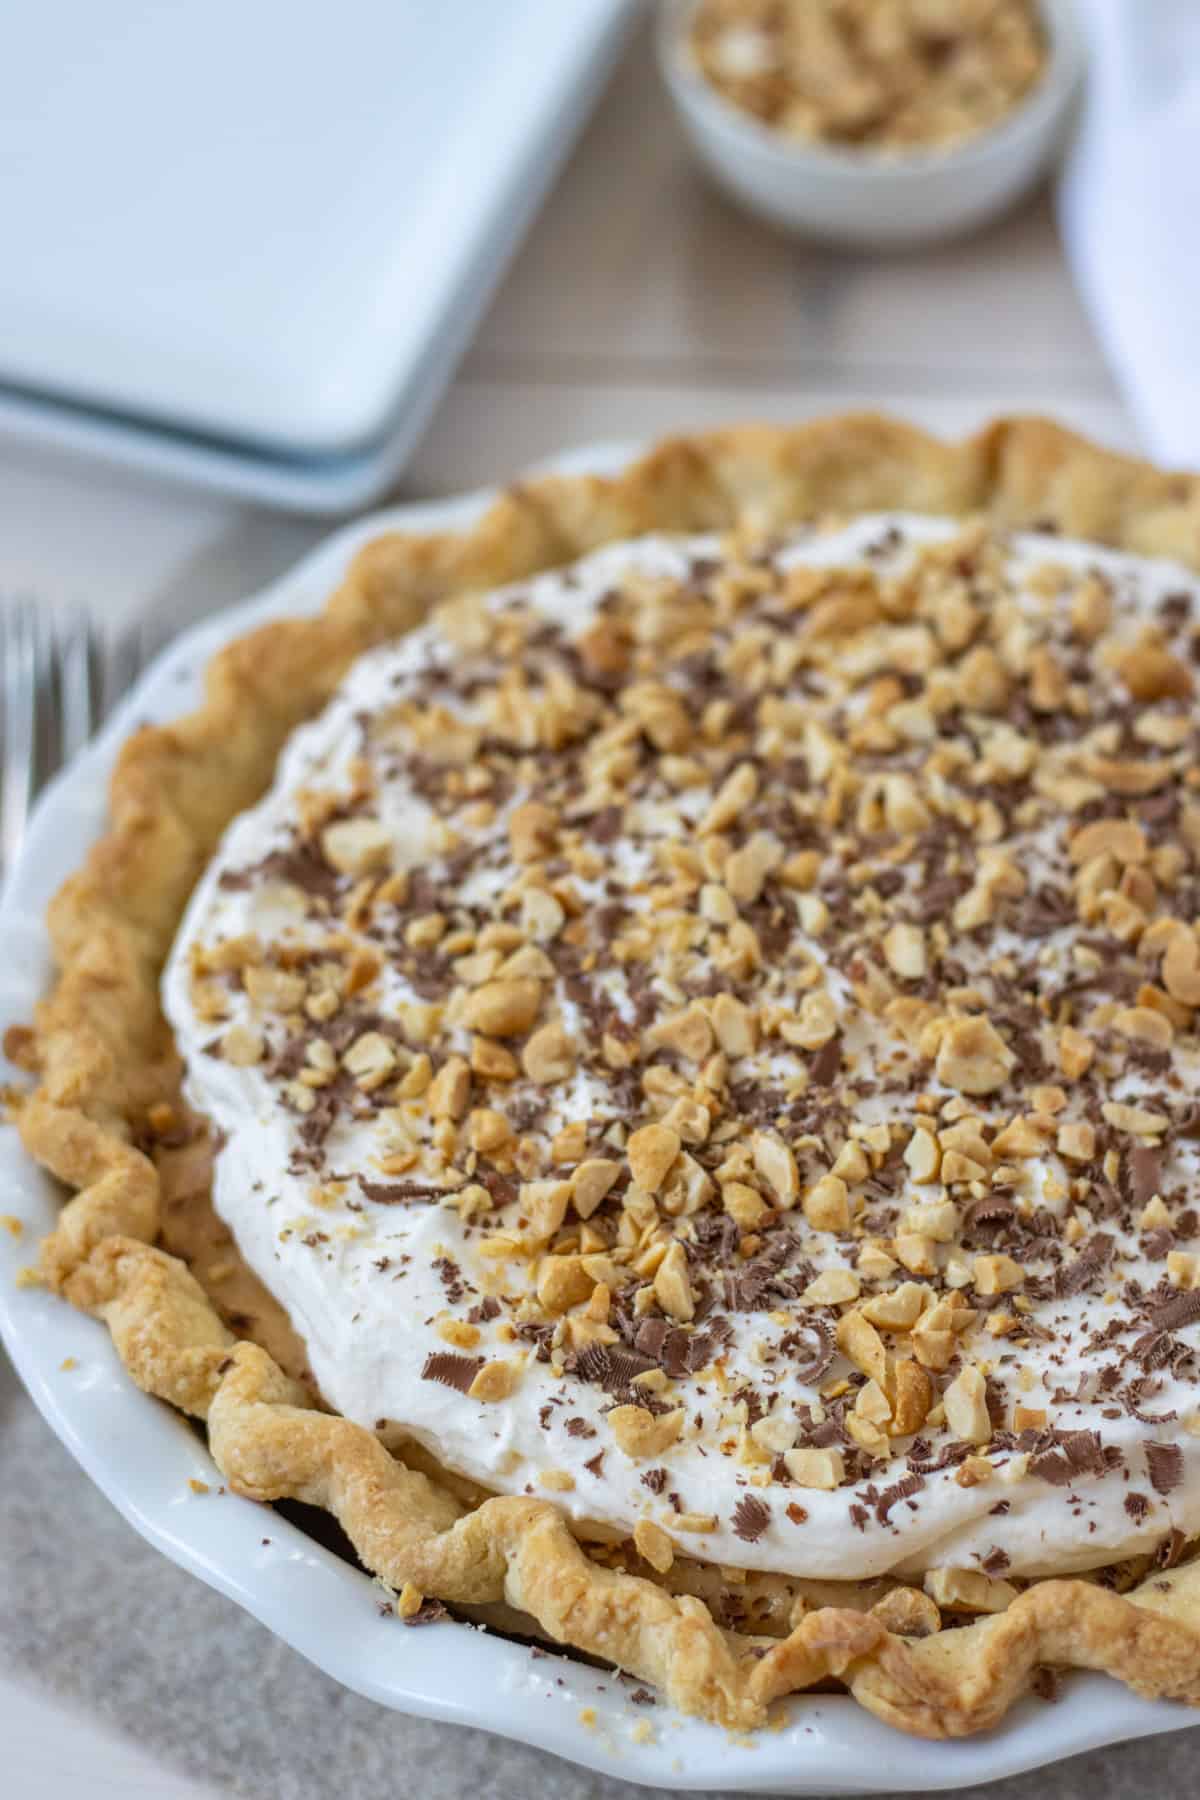
This Chocolate Peanut Butter Pie is made with a buttermilk pie crust and has equal layers of chocolate ganache, creamy sweetened peanut butter, and whipped topping. Finished with a grating of chocolate and chopped peanuts, this is one pie everyone will love!
Would you like to save this recipe?
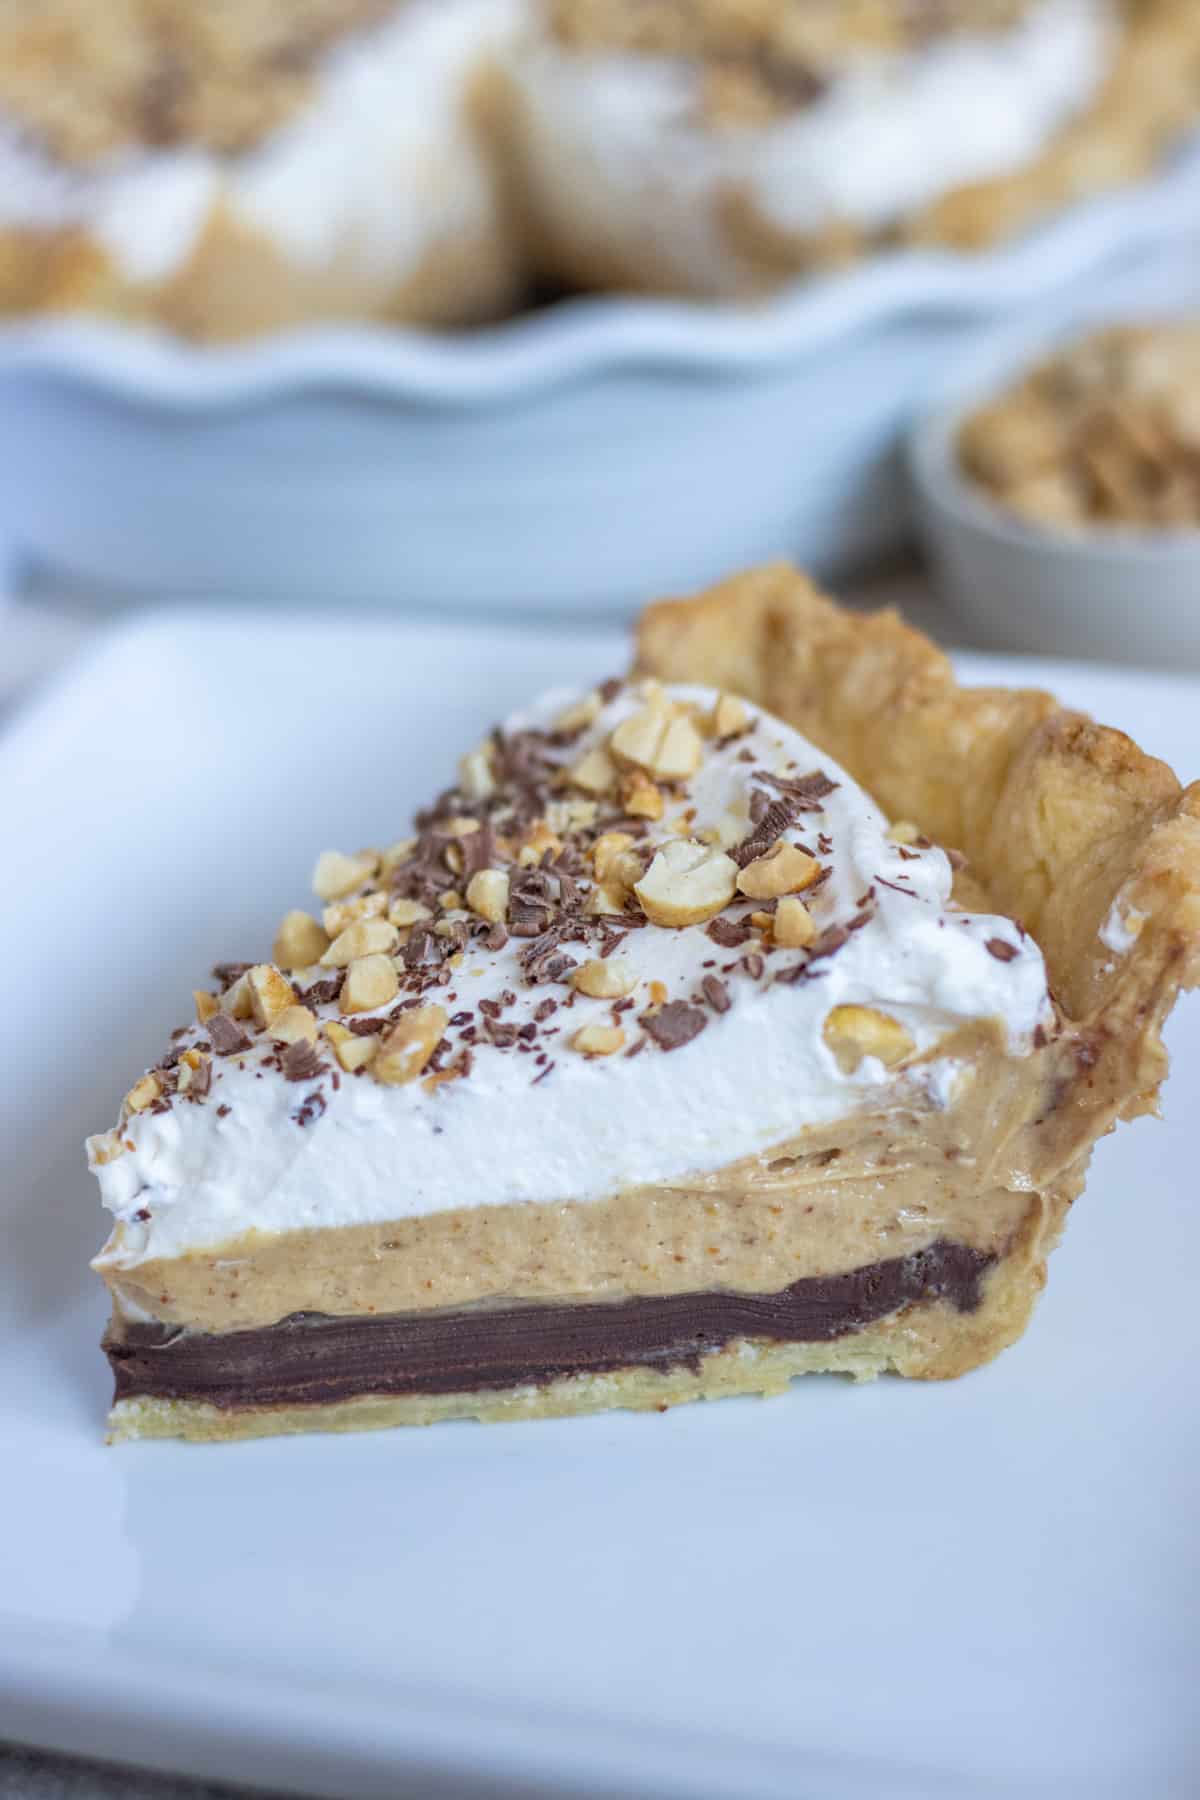
This chocolate peanut butter pie is decadent and so satisfying with layers of creamy chocolate, smooth peanut butter, lightly sweetened whipped cream, and bits of peanuts and shaved chocolate. Nestle it all in a flaky buttermilk pie crust for a sweet treat you won’t forget!
Or, put it all in a store-bought crust for a quick and easy dessert. Either way, it will be a hit!
Looking for more sweet treats? Try this Pineapple Cream Pie, these Lemon Poppy Seed Scones, or this Pumpkin and Cocoa Icebox Cake!
Why You’ll Love This Recipe
- The buttermilk pie crust is hearty enough to hold up to the filling while still being flaky
- The chocolate ganache adds a balance to the whipped peanut butter layer
- The topping of sweetened whipped cream, chocolate shavings, and chopped peanuts makes this a show stopping pie
Step By Step Instructions
Note: Full list of ingredients, their amounts, and instructions can be found in the recipe card below.
Step 1:
Preheat the oven to 350 degrees F.
Step 2:
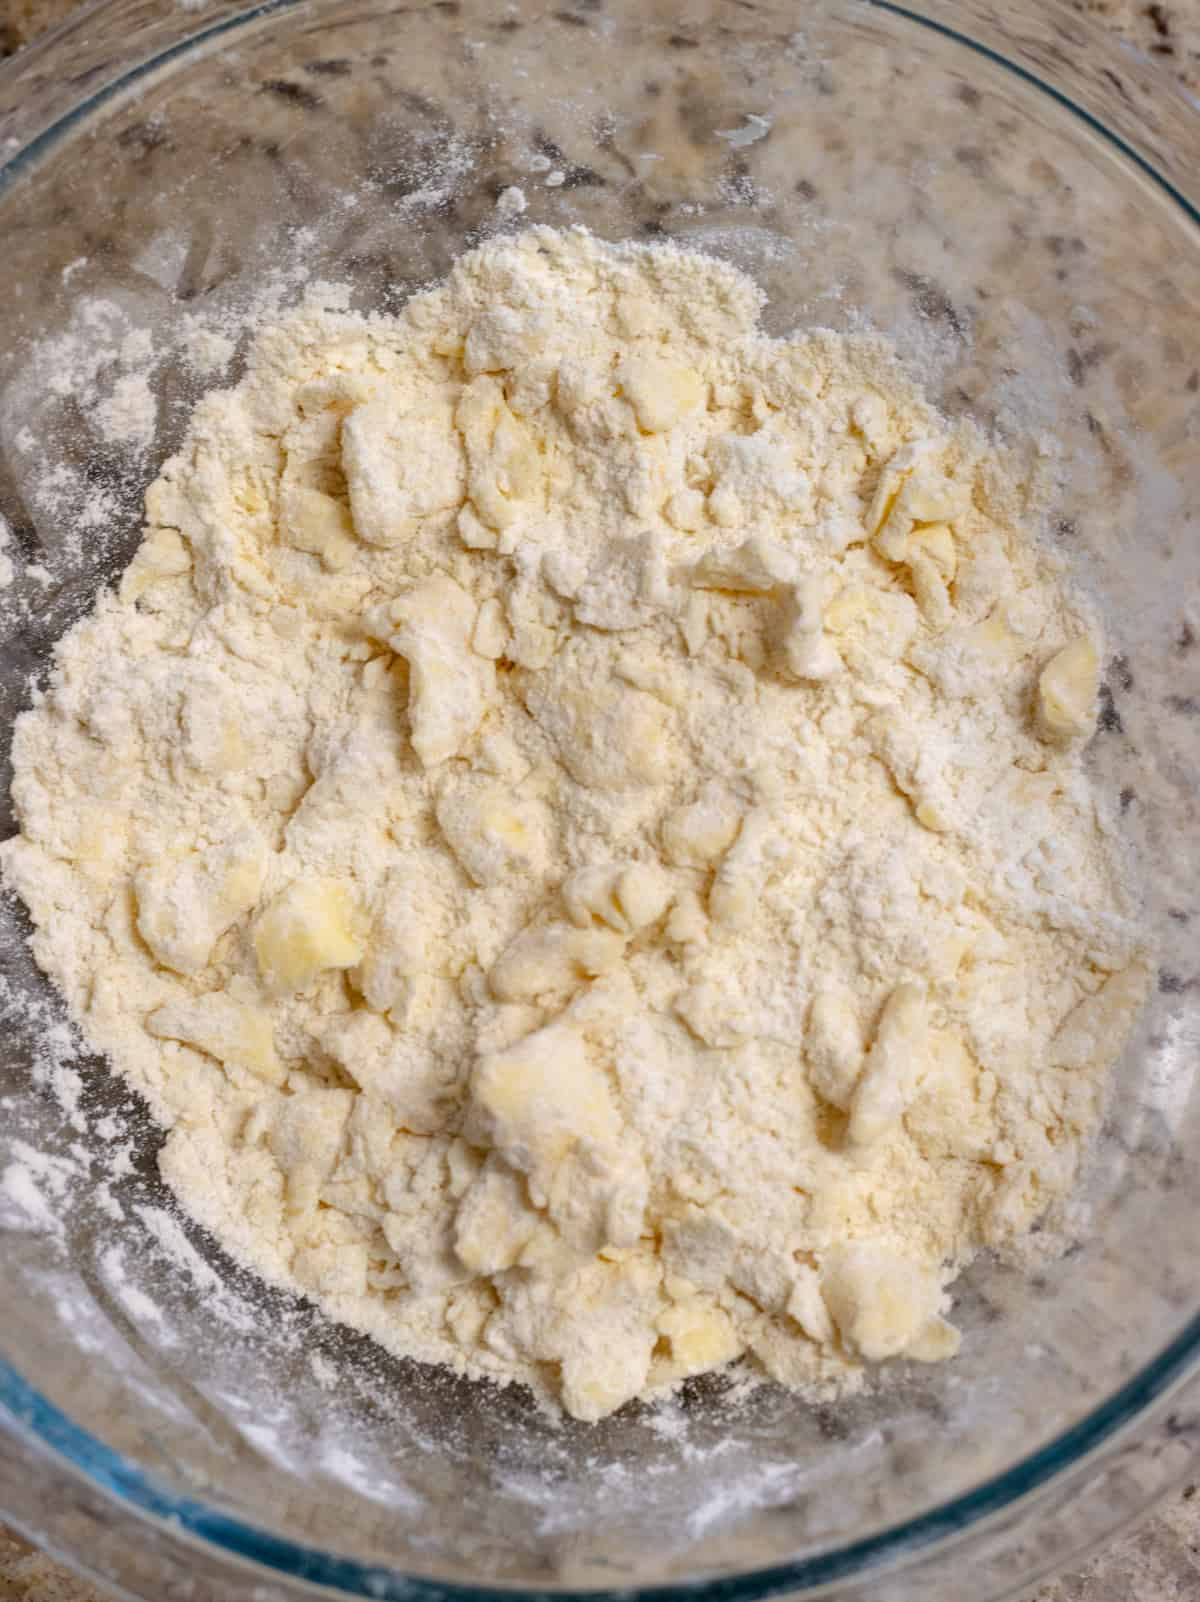
Mix together the flour, sugar, and salt. Then, add in the cubed butter and toss to coat. Using your fingers, smash each piece of butter until it becomes a flat disk then toss in the flour again.
Continue until all the butter has been smashed and there are pieces ranging from small pea-sized up to whole cashew-sized pieces.
Step 3:
Next, pour most of the buttermilk into the flour and butter mixture and, using your hands or a fork, toss to combine. If it needs a bit more moisture, add the reserved buttermilk.
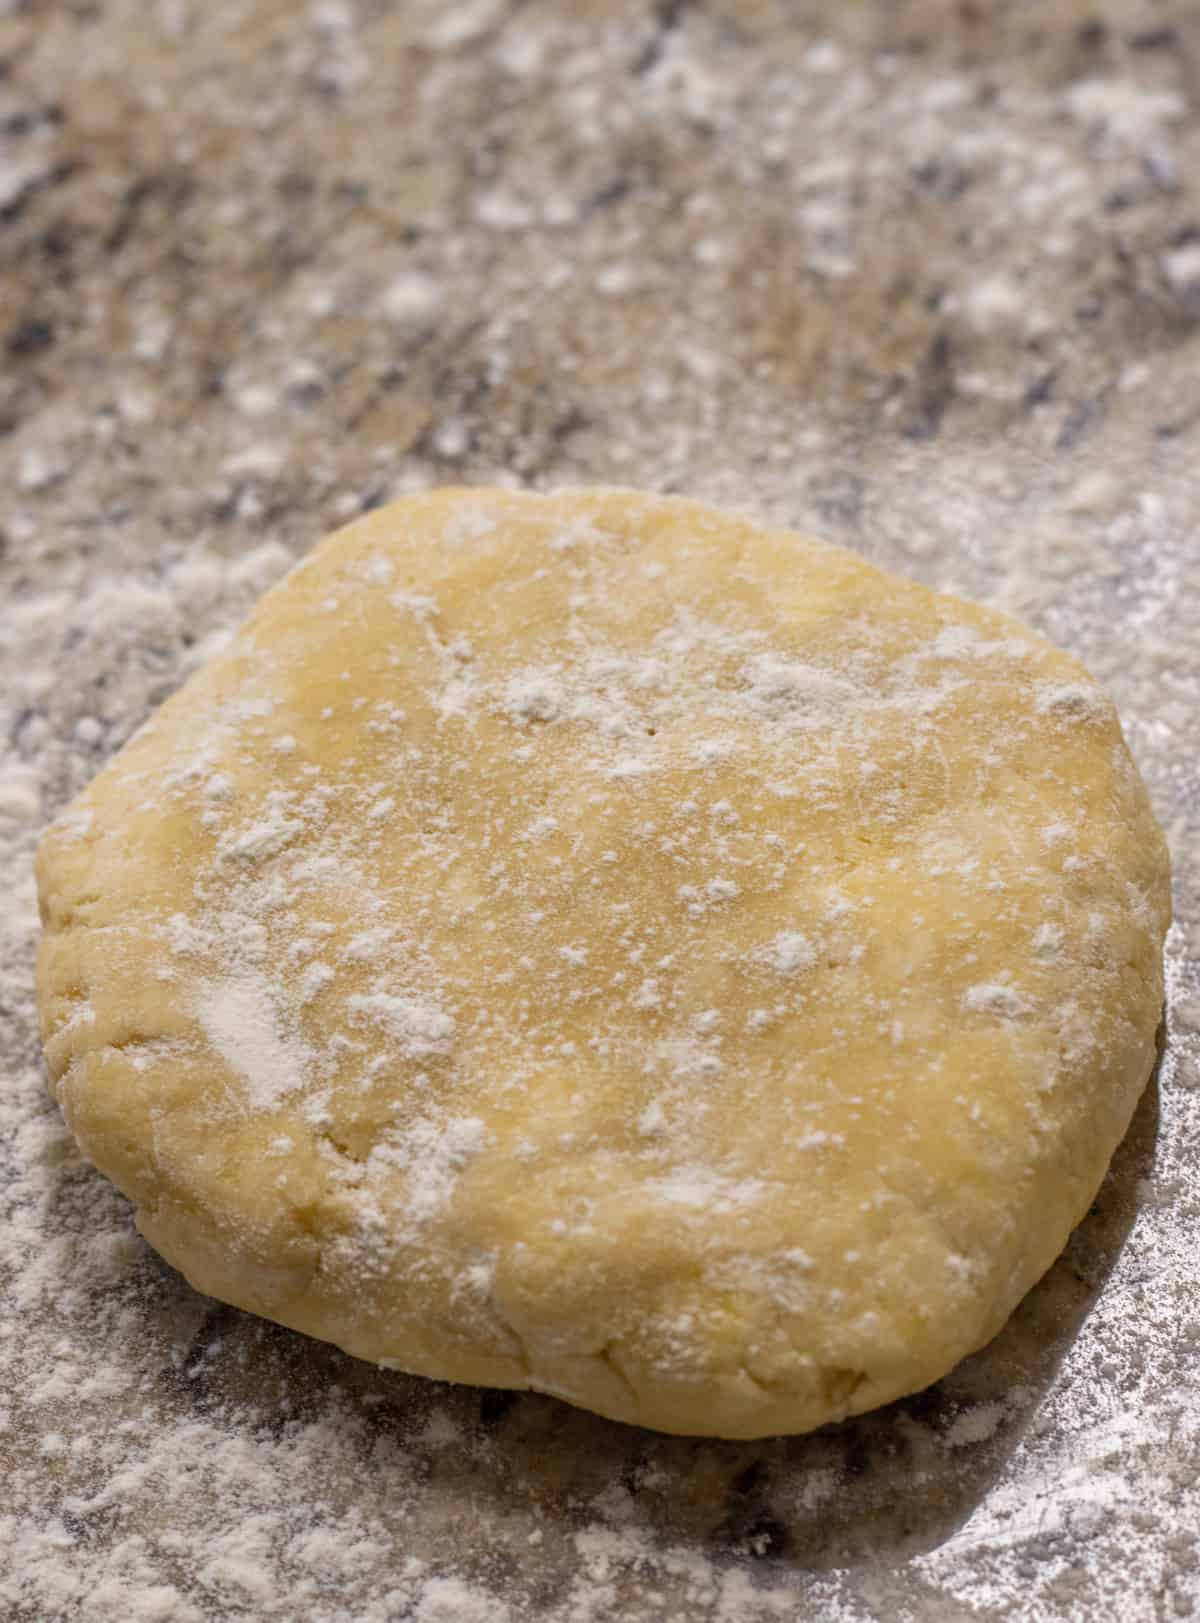
Then, dump the dough onto the counter and form it into a flat disk. Wrap in plastic wrap and refrigerate for at least 20 minutes or up to 2 days.
Step 4:
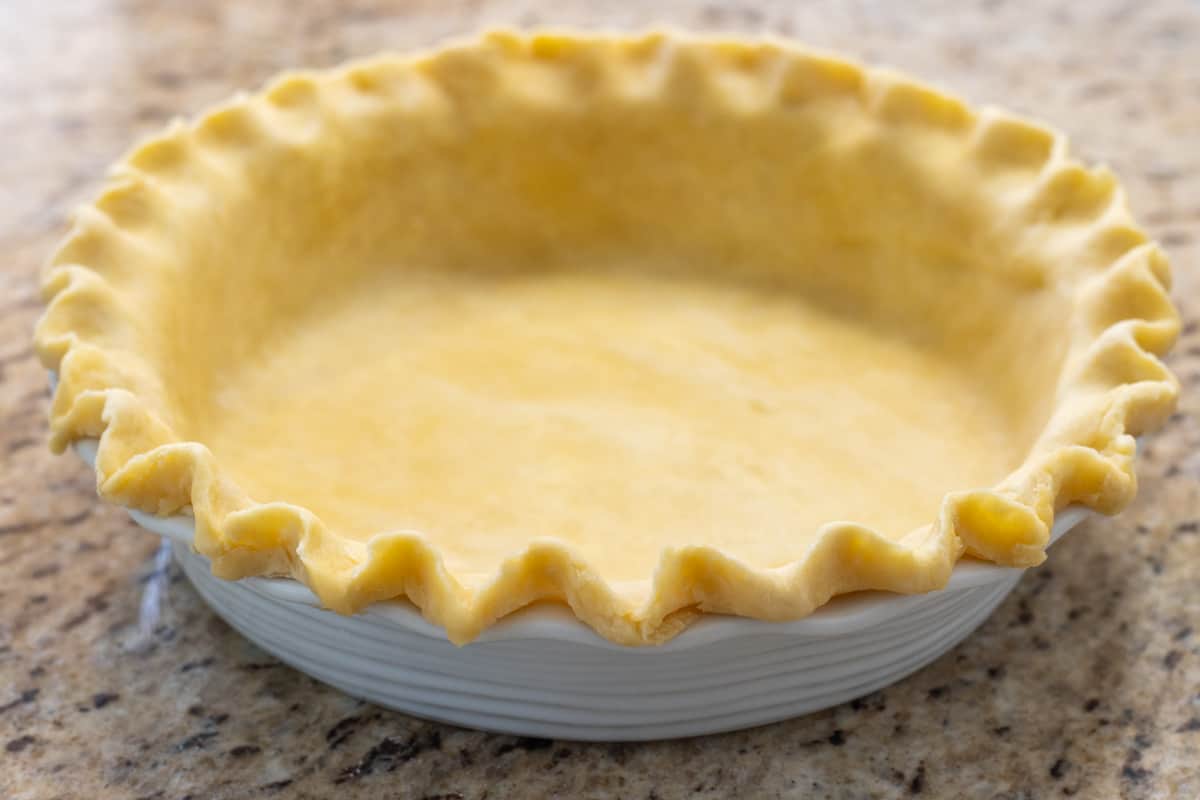
Roll the crust out, place it in the pie plate, and crimp the edges. If the dough is feeling soft or the butter seems to be softening, place the whole plate in the fridge for 20 to 30 minutes before moving on.
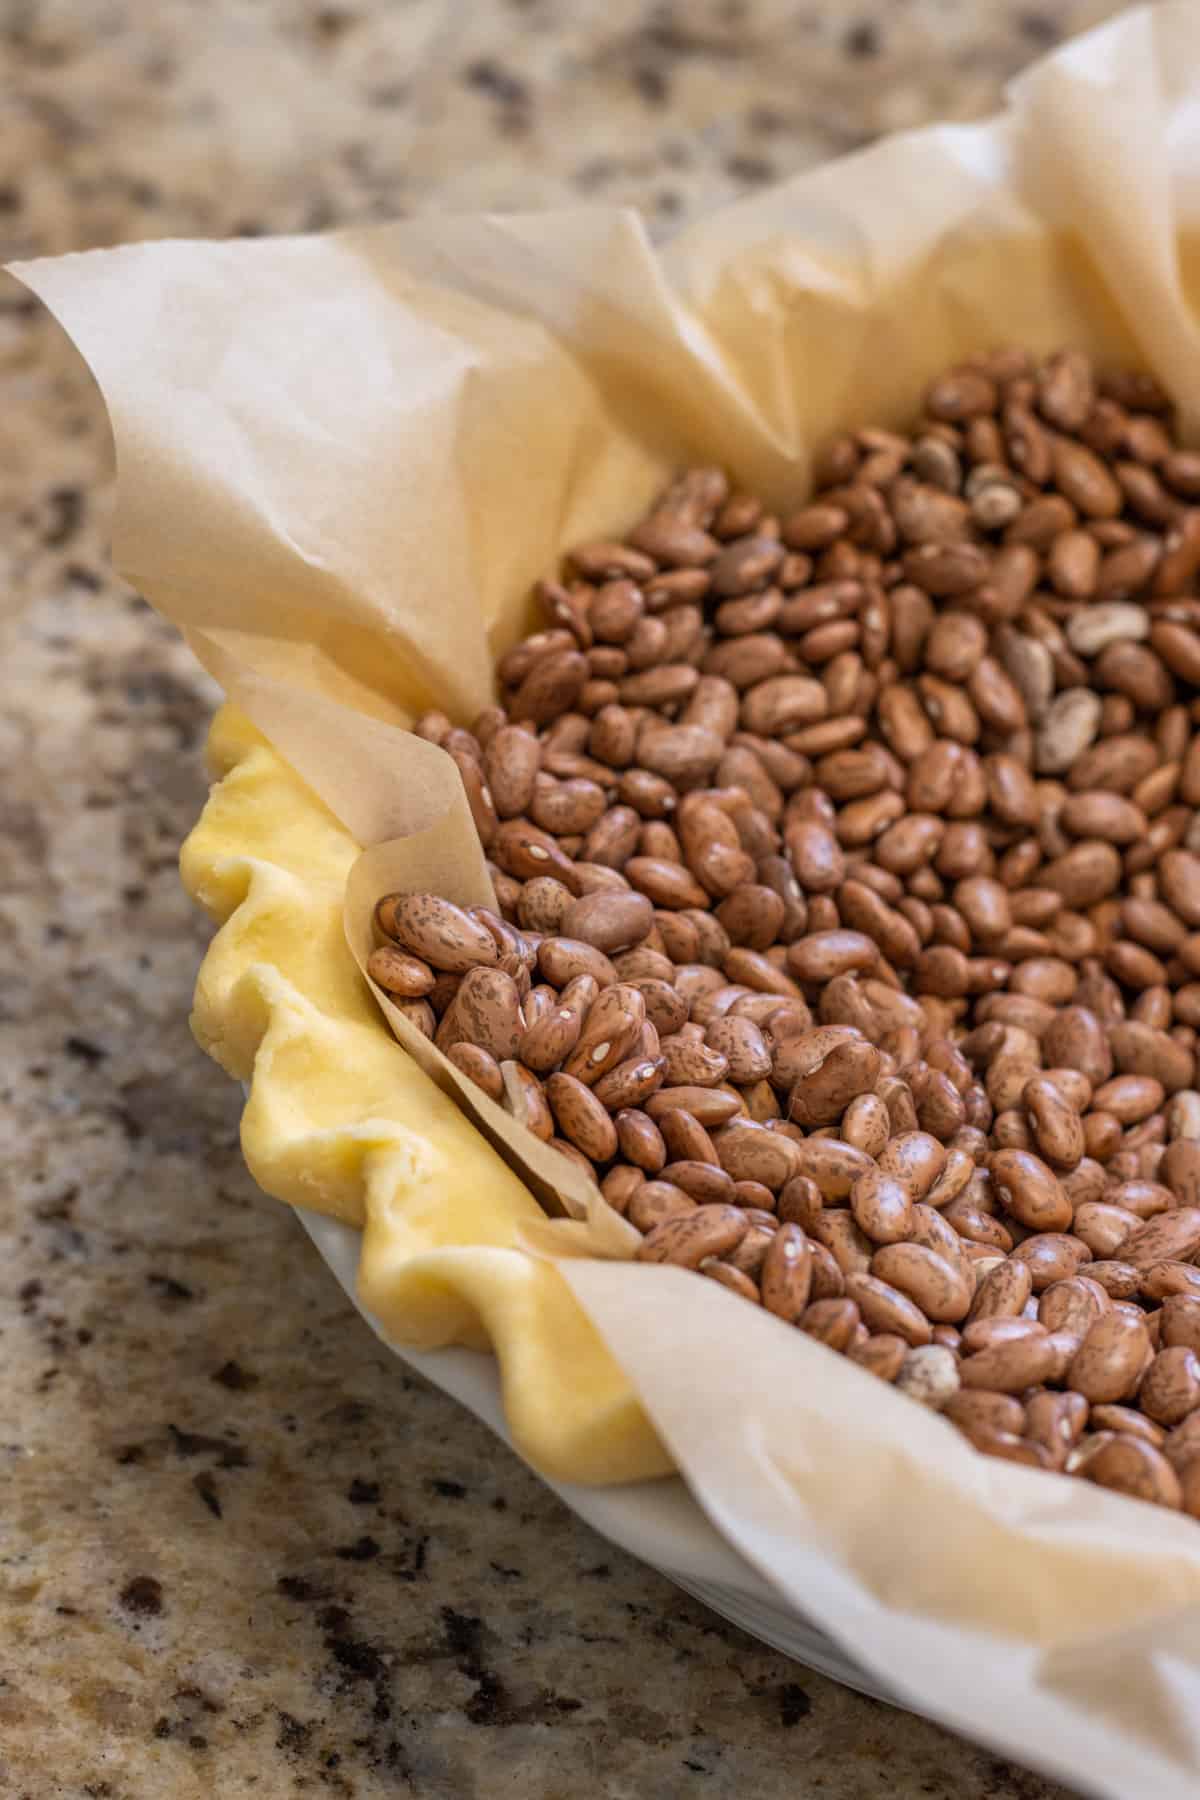
Step 5:
Line the crust with parchment paper then fill with either dry beans (I use pinto beans that I save for this purpose) or pie weights.
Bake for 15 minutes, remove the beans and parchment paper, prick the bottom of the crust all over with a fork, and bake for another 15 minutes. Allow it to cool completely, about 1 hour.
Want more information on how to make this buttermilk pie crust? Click the link to get all the tips and tricks you need.
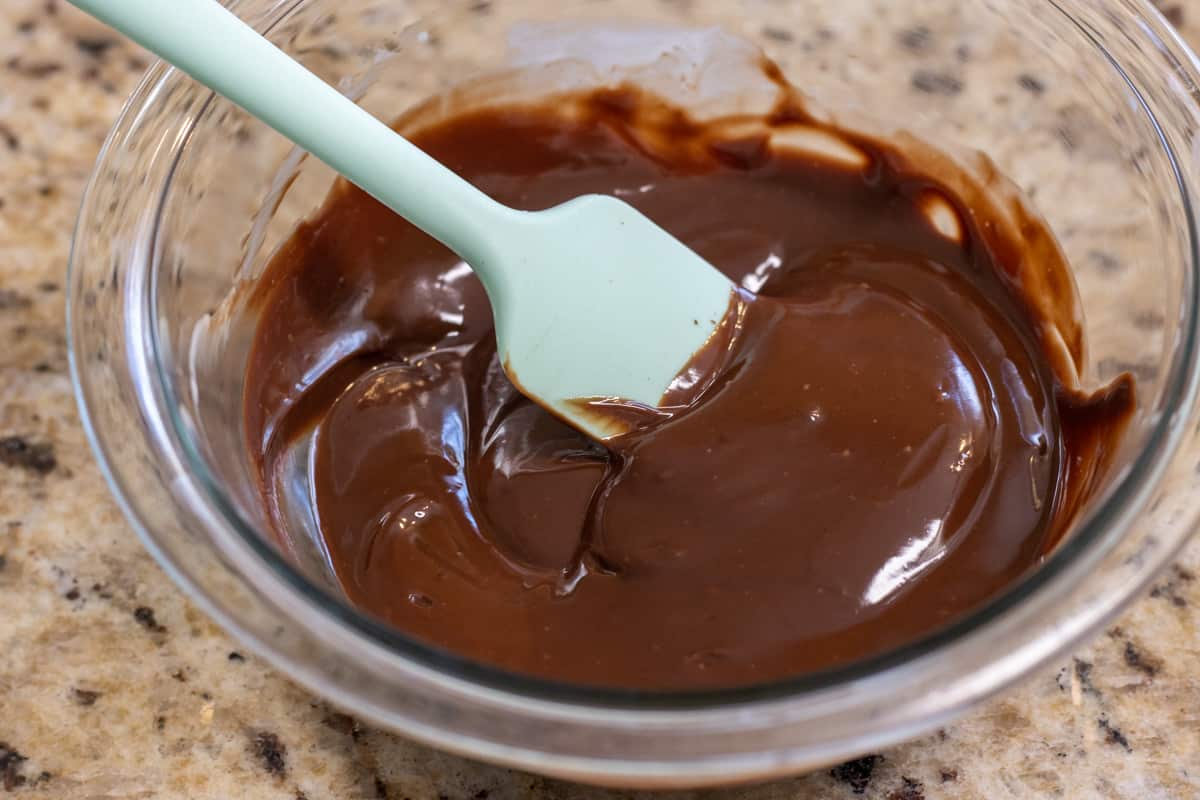
Step 6:
Meanwhile, make the chocolate ganache. Simply heat up the heavy cream on the stove over medium heat until it is hot but not bubbling (watch closely!) then pour it over the chocolate and mix until it’s all combined. Allow the ganache to cool while the crust is cooling.
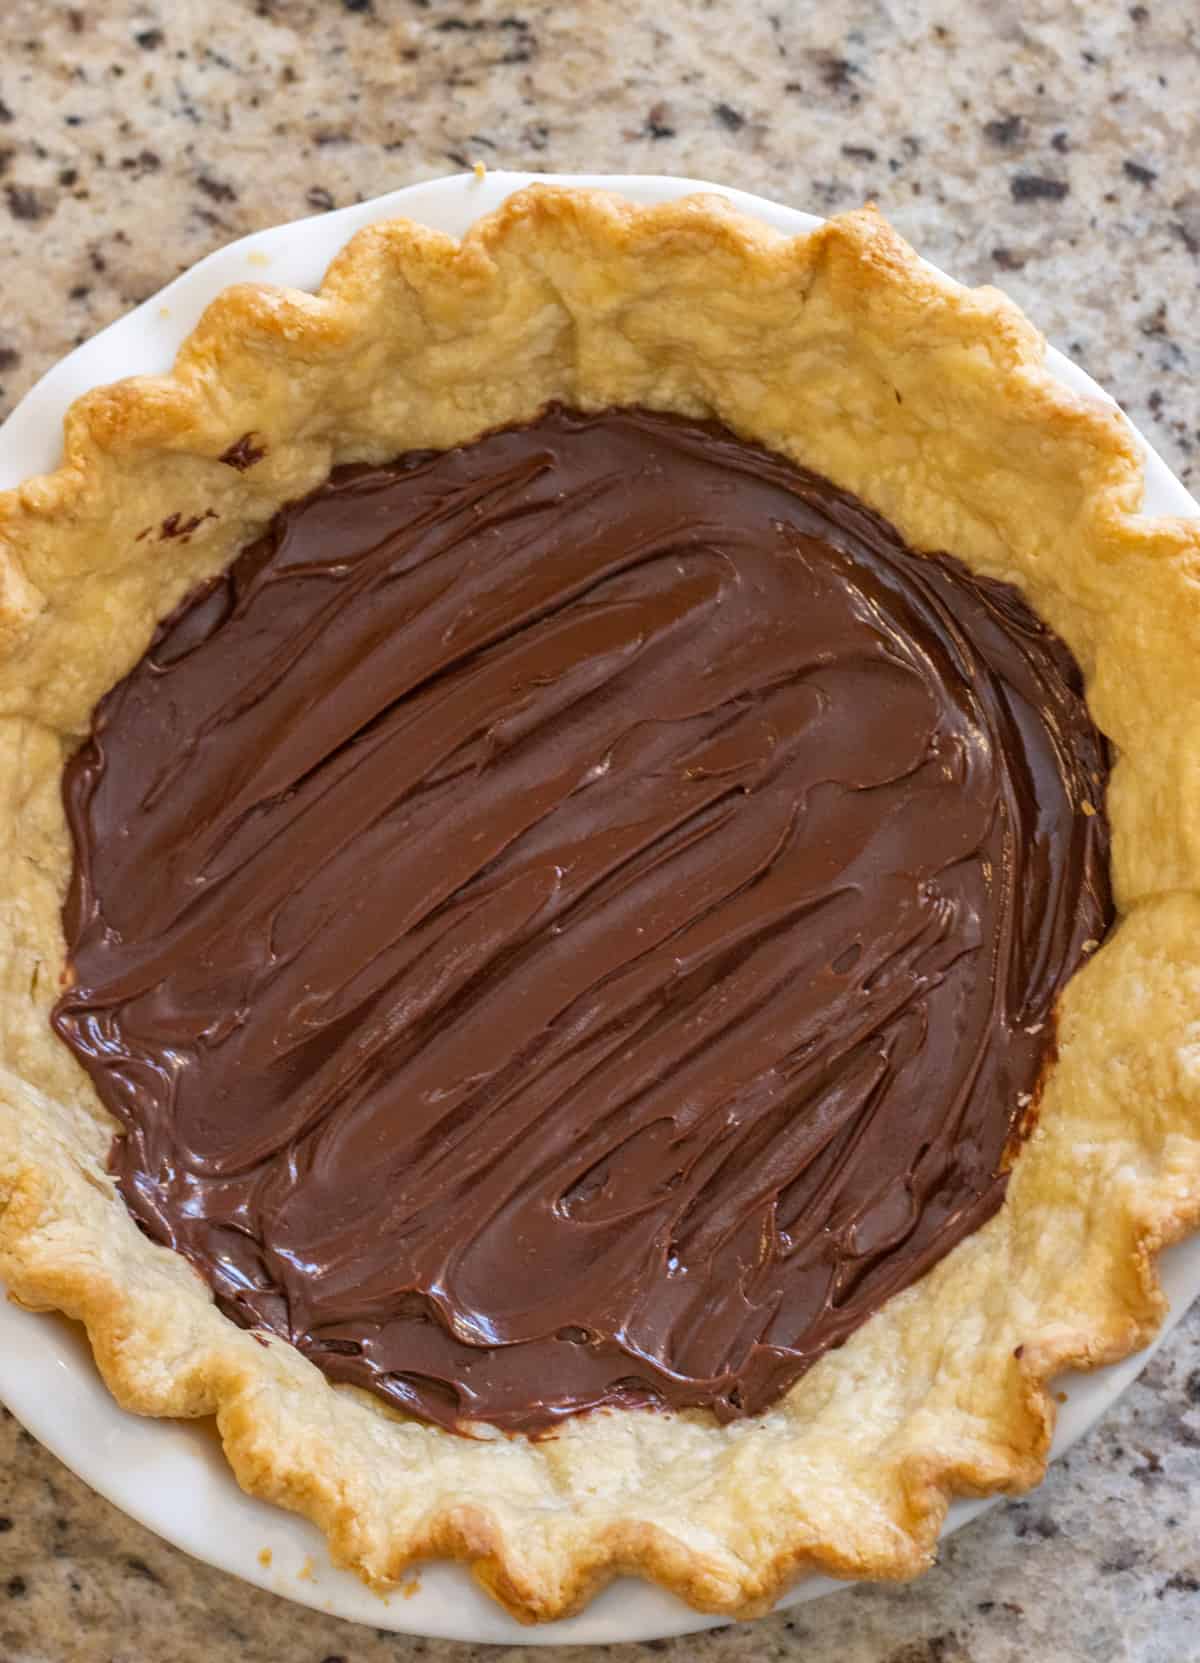
Step 7:
To assemble the pie, first spread the ganache layer on the bottom of the crust. Then, place the pie in the fridge while you make the fillings.
Step 8:
Next, whip the heavy cream, powdered sugar, and vanilla together on high speed of an electric mixer until stiff peaks form. Set aside.
In a separate bowl, cream together the cream cheese, peanut butter, powdered sugar, and heavy cream until smooth and whipped, about 3 minutes.
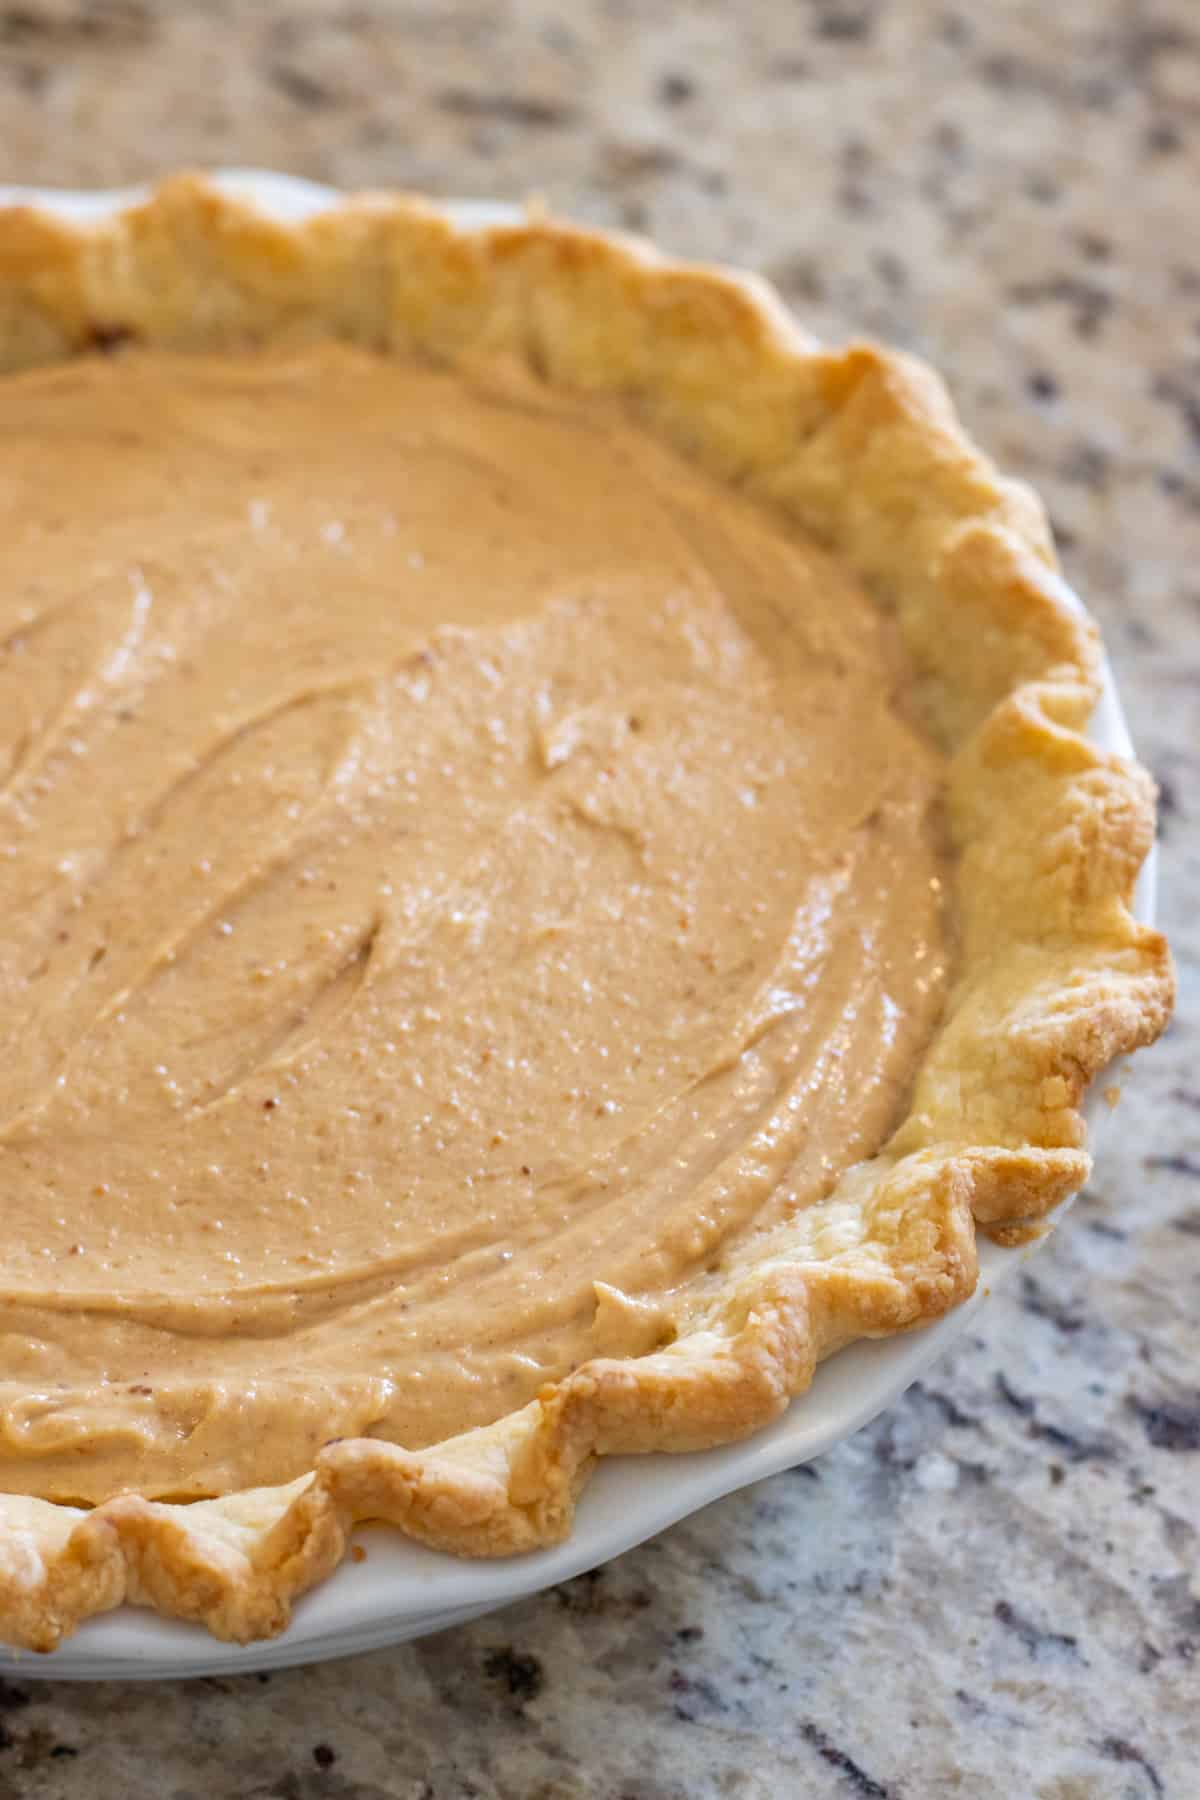
Step 9:
Spoon the peanut butter mixture over the ganache and smooth it out.
Step 10:
Top the pie with the whipped cream. Then, add the shaved chocolate and chopped peanuts.
Step 11:
Chill for 4 hours or overnight before serving.
Enjoy!
Tips & Tricks
The trickiest part of this whole pie is the crust and it’s really not even that tricky. The biggest thing to pay attention to is that the dough remains cold especially before it goes into the oven.
If you’re not sure it’s cold enough, pop it back in the fridge for about 20 minutes then bake.
Storage
Cover the pie with plastic wrap or transfer it to an airtight container.
It can be kept in the fridge for up to 5 days.
Did You Make This Recipe?
I’d love to hear about it! Please leave a star rating ⭐️ ⭐️ ⭐️ ⭐️ ⭐️ and comment below!
Let’s Get Social!
I love seeing your photos! If you make this recipe don’t forget to mention @ThisHomeKitchen and tag #thishomekitchen on Instagram!
You can also follow me on Pinterest, Facebook, and Youtube!
Subscribe to My Newsletter!
Get my newest recipes, kitchen tips and tricks, and the latest news right in your inbox!

Chocolate Peanut Butter Pie
Ingredients
Buttermilk Pie Crust
- 1 1/4 cup all-purpose flour spooned and leveled
- 1 teaspoon sugar
- 1/2 teaspoon sea or kosher salt
- 4 ounces unsalted butter 1 stick, cubed and cold
- 1/3 cup buttermilk cold
Chocolate Ganache
- 3 ounces semi-sweet chocolate bar
- 1/3 cup heavy whipping cream
Peanut Butter Filling
- 1 cup creamy natural peanut butter
- 1 cup powdered sugar
- 1 cup heavy whipping cream
- 4 ounces cream cheese room temp
Whipped Topping
- 1 cup heavy whipping cream
- 1/4 cup powdered sugar
- 1 teaspoon vanilla extract
Additional Toppings
- 1 ounce semi-sweet chocolate bar
- 1/4 cup peanuts roughly chopped.
Instructions
Make the Pie Crust
- Preheat the oven to 350 degrees F.
- Mix together the flour, sugar, and salt. Add the cold cubed butter and toss to coat. Then, using your fingers, smash the butter pieces until they are broken up into pieces ranging from pea to cashew size.
- Pour in most of the buttermilk, reserving about 1 tablespoon. Toss to combine. If the dough is still a bit too dry to hold together, add the rest of the buttermilk.
- Dump the dough out onto the counter and press until it all comes together. Form the dough into a disk and wrap it in plastic wrap. Chill for 20 minutes.
- Roll out the dough to fit a 9-inch pie plate with a bit of overhang. Transfer the dough to the pie plate. If the dough is feeling too soft or the butter is softening, place the whole thing back in the fridge for another 20 minutes.
- Fold the edges of the crust under and remove any excess crust, moving it to sparse areas if needed. Using your fingers, crimp the edges of the crust.
- Line the crust with parchment paper then fill with dry beans or pie weights. Bake for 15 minutes. Remove the parchment paper and beans, poke the bottom all over with a fork, and return to the oven for another 15 minutes or until browned and baked through. Cool completely, about 1 hour.
Make the Chocolate Ganache
- While the crust is baking, make the ganache. Heat the heavy cream in a pan over medium heat until it is hot but not yet bubbling. Pour it over the chocolate and stir until combined. Allow the ganache to cool.
- Spoon the ganache into the bottom of the cooled pie crust and smooth it out. Place the pie in the fridge so the ganache can set while you make the whipped topping and peanut butter filling.
Make the Peanut Butter Filling
- In a large bowl, add the peanut butter, powdered sugar, heavy whipping cream, and cream cheese. Whisk until smooth and airy, about 3 minutes.
Make the Whipped Topping
- In a bowl, add the heavy whipping cream, powdered sugar, and vanilla extract. Whip on the high speed of an electric whisk until stiff peaks form. Set aside.
Assemble the Pie
- Pour the peanut butter filling into the pie crust and smooth it out.
- Top with the whipped topping. Grate the chocolate over the top. Then, sprinkle on the chopped peanuts.
- Chill for 4 hours or overnight before serving.
I made this pie for my brother-in-law for his birthday gift. He was sweet and shared with us all. The buttermilk pie crust is so smooth and buttery! The chocolate gnache set up to be a layer of pure delight. The whipped peanut butter layer is so smooth, fluffy and envelopes your entire mouth in velvety goodness! The whipped topping is just as you’d exact! Velvety and sweet! On a scale of one to ten, this pie is a 27! Simply the best!!
Omgosh !! there are so many recipes to start with and all my favorites. loving it!! 👍
Awe, love to hear that! Thank you!